Motorola Moto One 5G Ace FRP bypass Without a PC/Computer guide is finally here. Bypass Google verification using this free method. Easily unlock FRP from a Moto 5G Ace device without using a Computer/PC.
Factory Reset Protection is an important security feature that is built-in with all Motorola Android devices. Whenever a Motorola device gets a Factory Reset or Hard Reset, the FRP lock automatically activates. It works as a security layer to protect the important saved in the Android device.
Now, once a device gets a Factory Reset or Hard Reset, it will start from the initial setup. And during that setup, it asks for the previously submitted Google account.
However, if you don’t remember the Gmail ID or Password of the synced Google account. Then the only solution left is to bypass the Google verification lock.
Jump to
Motorola Moto One 5G Ace Bypass Google Account Verification – Android 12
Typically, the Google verification lock works with Android versions 5 to 13. Now, the Motorola One 5G Ace device was announced in 2020 with the Android version 10. But, in the last 3 years, this device got updates for the latest Android versions.
The Bypass FRP lock from the Moto One 5G Ace guide works for all Android versions. From Android 10 to the latest Android version 13. That means, you can bypass FRP lock from Moto One 5G Ace Android 10, 11, 12, and Android 13 with the help of this free guide.
Luckily, we have a free guide that works like a charm to bypass Google lock from Motorola One 5G Ace device. The method is quite straightforward. We tried our best to make it as simple as possible so that everyone can use it to unlock FRP from their Motorola One 5G Ace device.
Motorola Moto One 5G Ace FRP Bypass Without PC – Complete Guide
This is a complete step-by-step guide to bypass the Google verification lock from Motorola One 5G Ace device. Use this free method to easily unlock FRP from your Android phone.
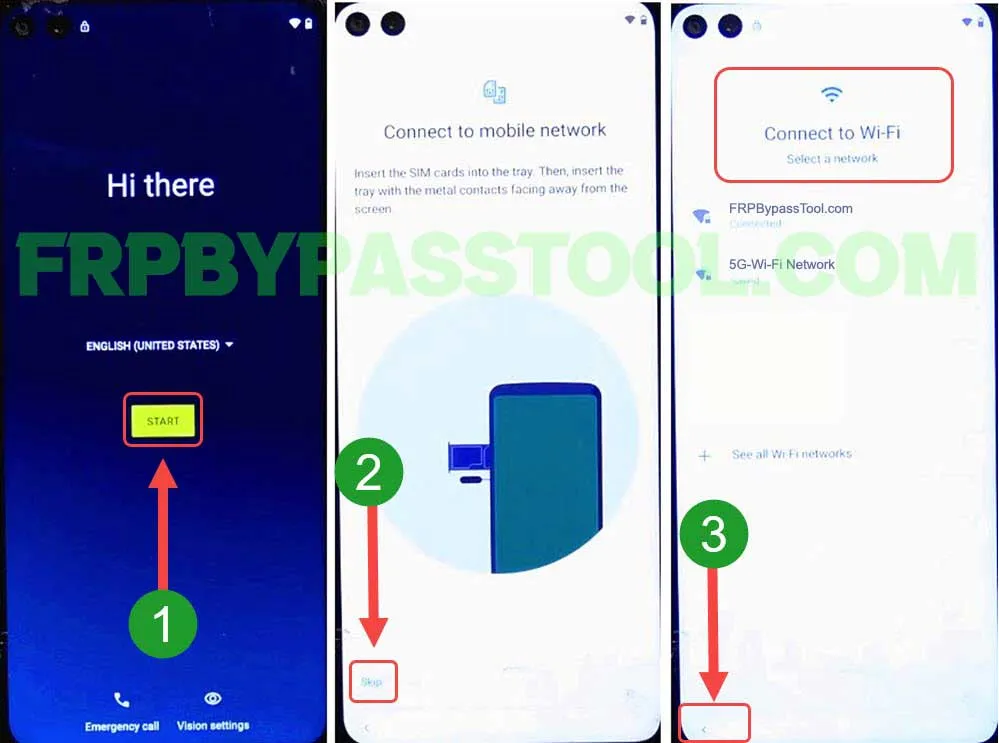
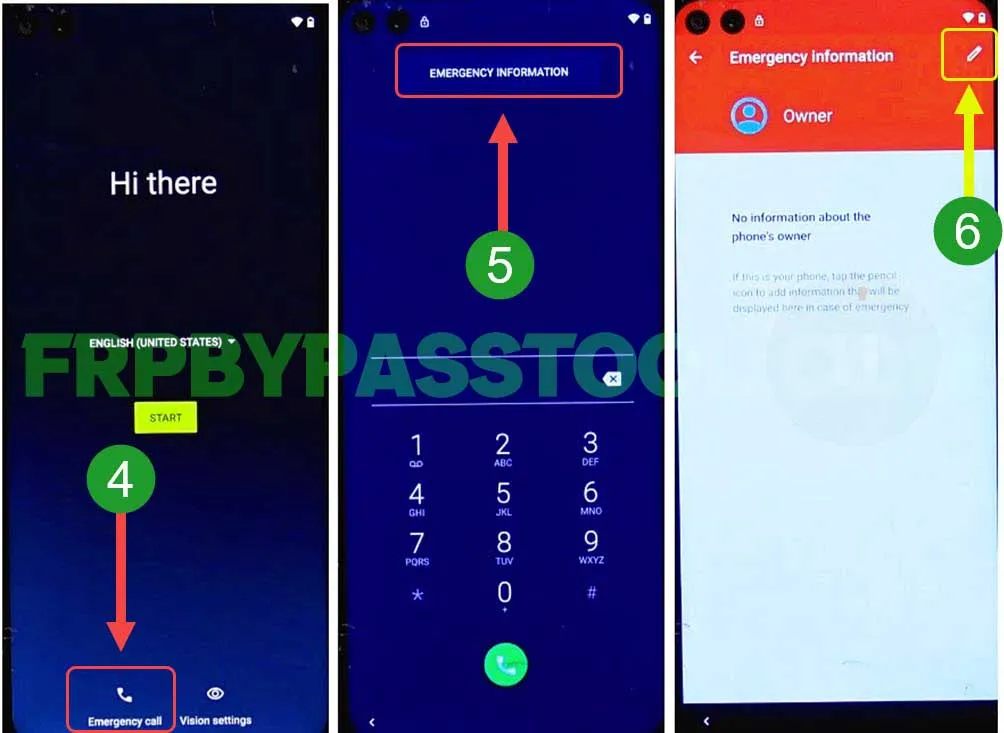
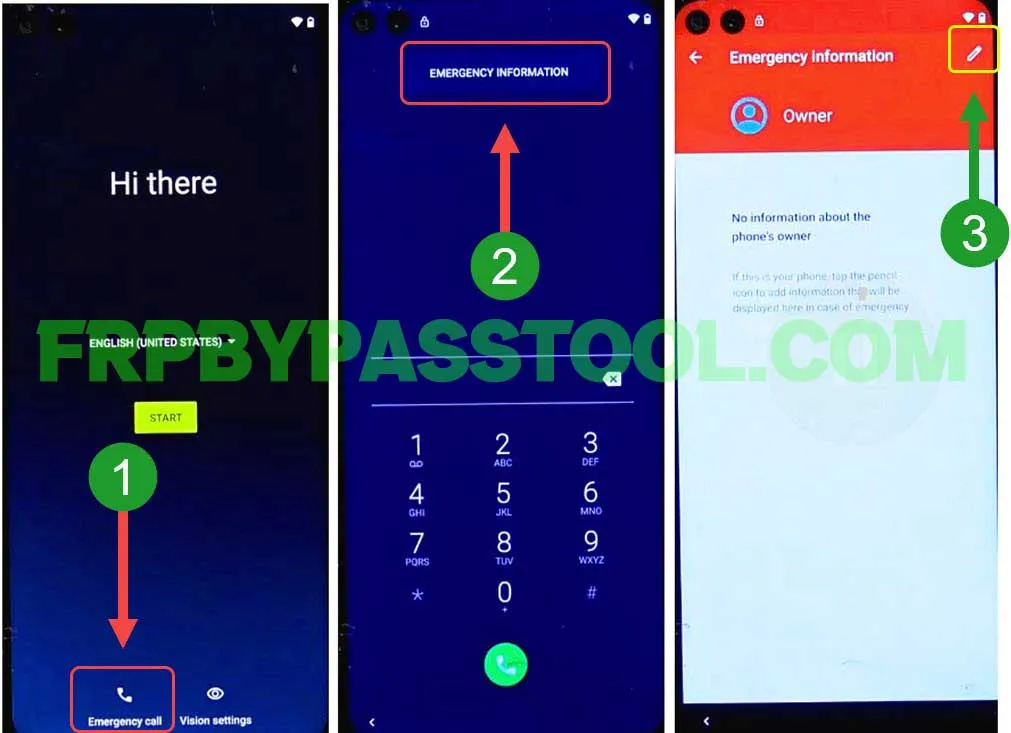
1. Start by connecting to a Wi-Fi network and then go back to the Welcome screen.
2. Go to the “Emergency Call” and double tap on “Emergency Information” to open more details.
Now, tap on the “Pencil icon” to edit the details of contacts.
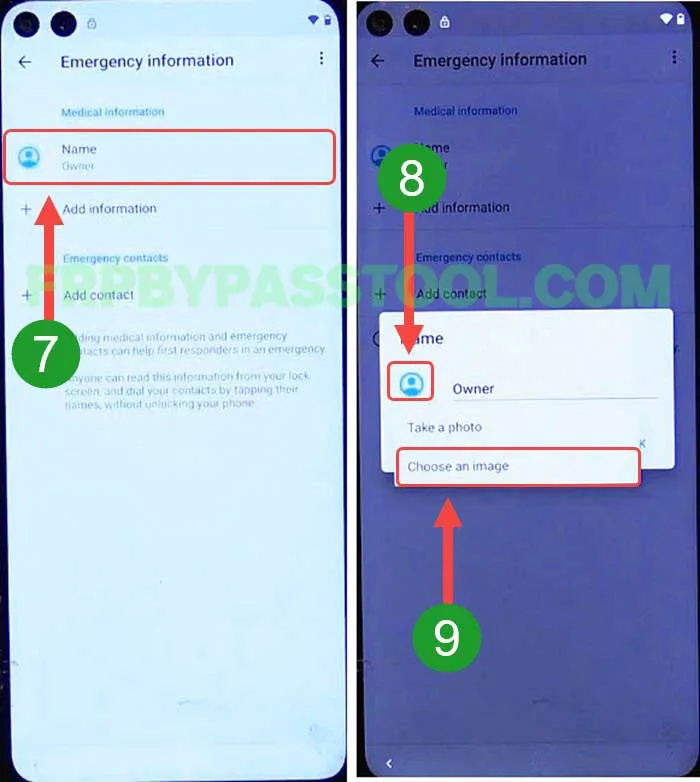
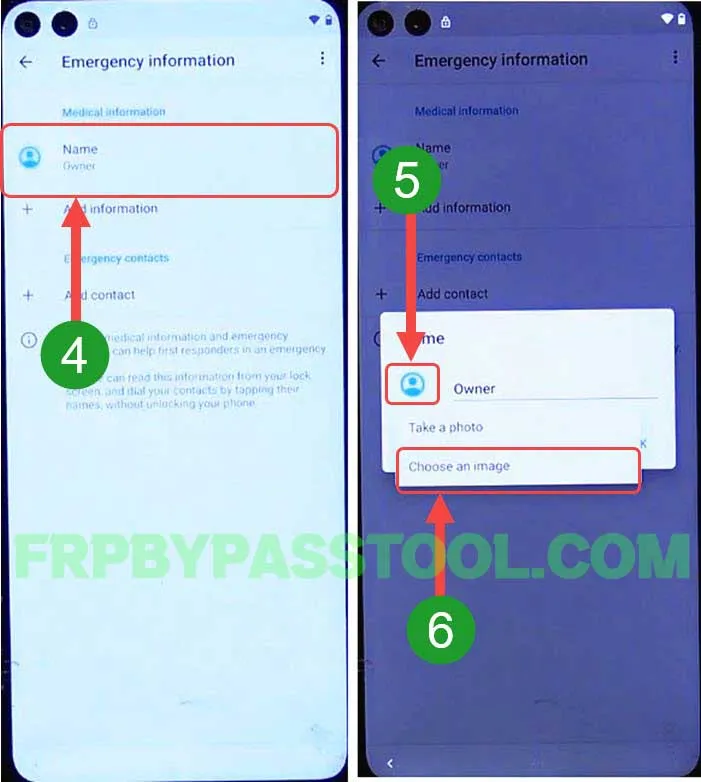
3. Inside Emergency information, you’ll find “Medical Information” tap on the “Name”.
Then, hit the “Image icon” and select “Choose an image” from the drop-down menu.
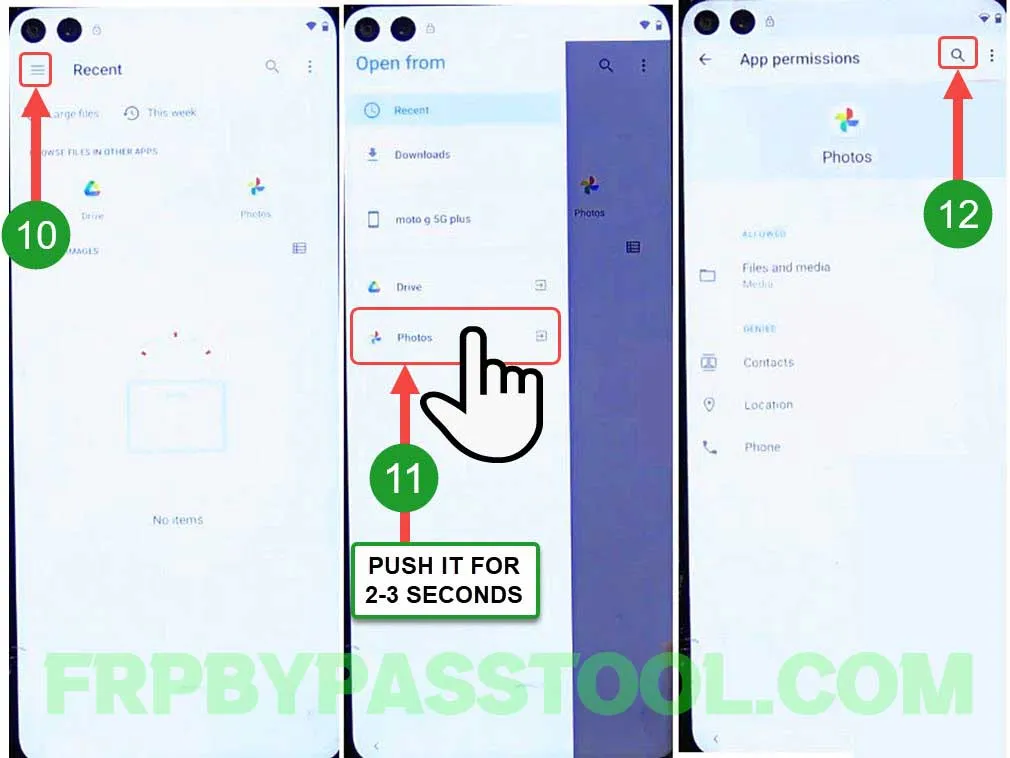
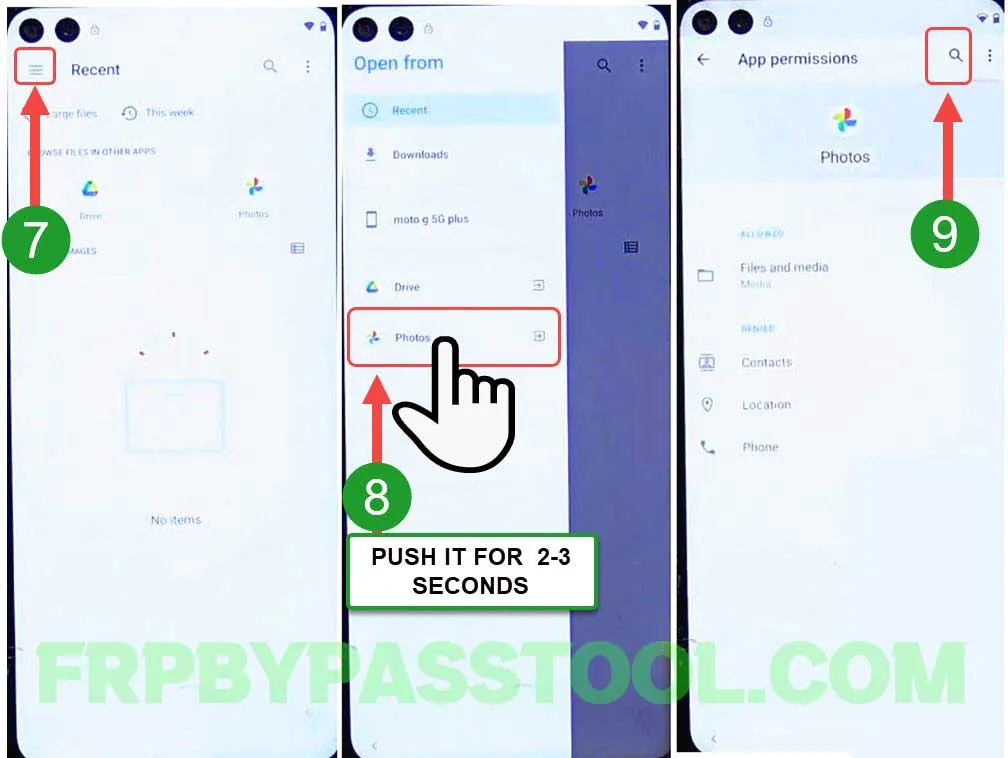
4. After that, it will open up the “Recent files” section, tap on the “-” hamburger icon on the top left corner.
Then “Push and Hold” the “Photos” option for at least 2-4 seconds.
This will open the “App Permissions” for Photos, tap on the “Search Icon”.
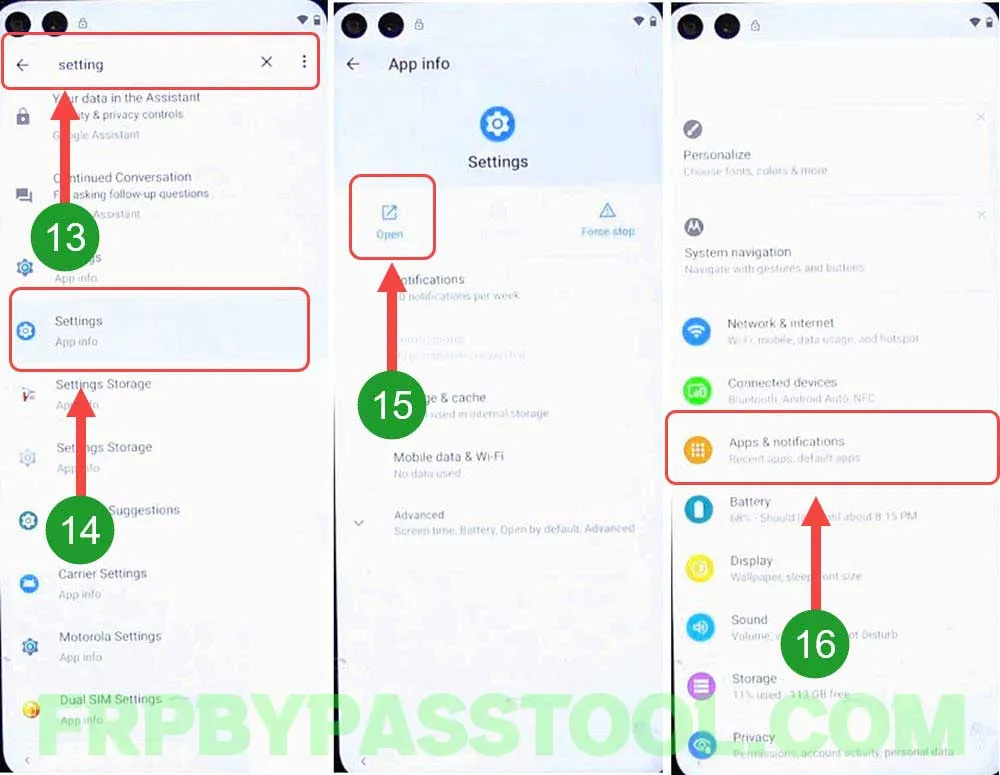
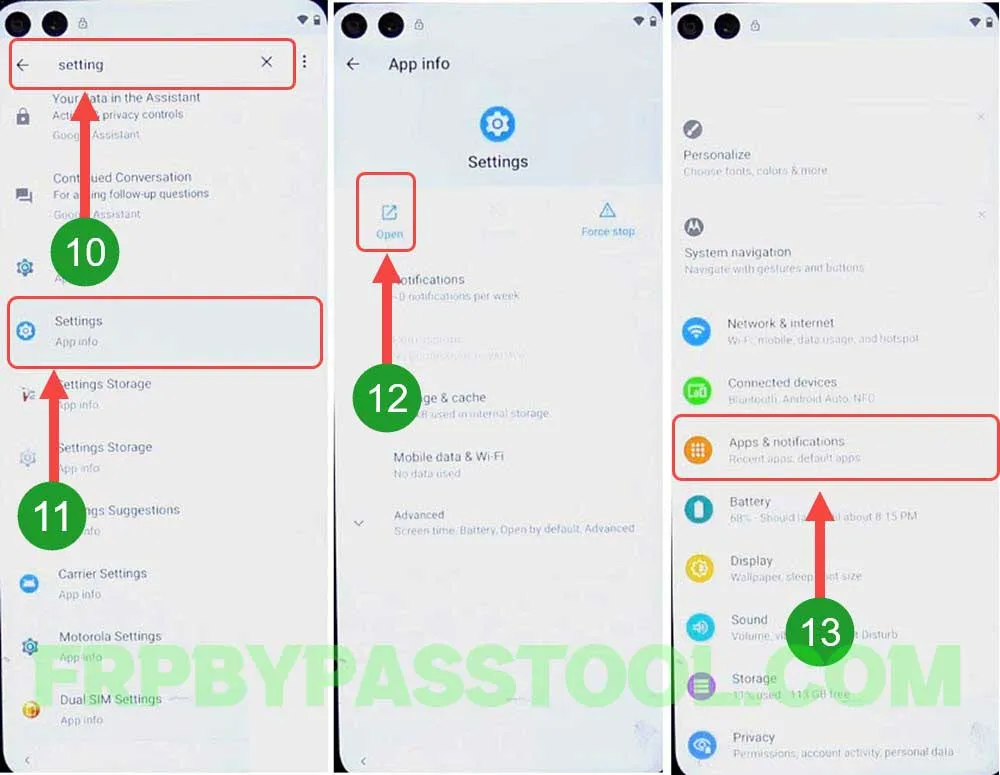
5. Type and search for “Settings” on the search bar and then select “Settings with App info” from the results.
Next, the Settings with App info appears on the screen, Tap on the “OPEN” button and this will open the Settings of your phone.
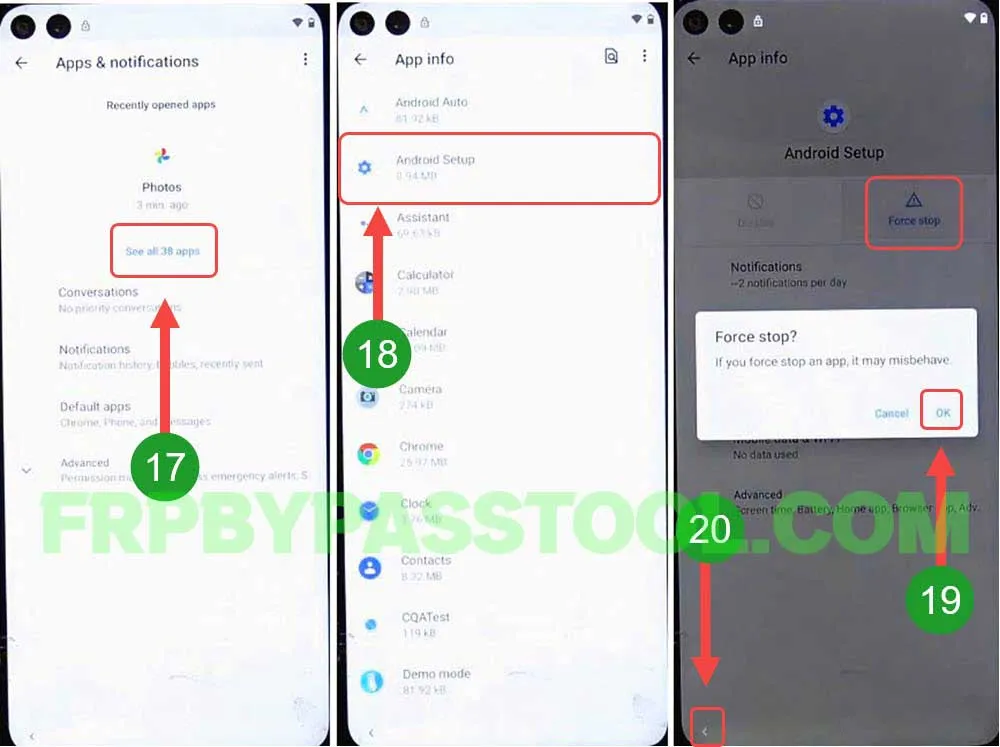
Select “Apps & Information” from the settings.
6. After that, hit the “See all apps” button, and then open the “Android Setup” app.
Now, we have to “Force Stop” the Android Setup application and then go back to the App info.
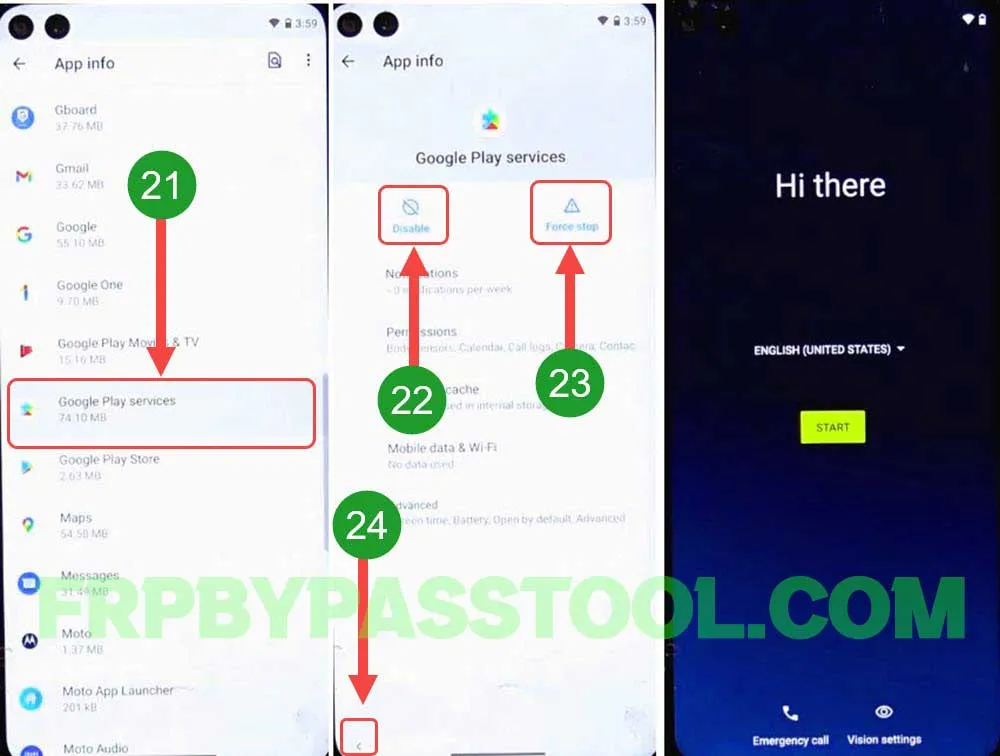
7. This time, look for the “Google Play Services” app.
Open Google Play Services, first Disable then Force Stop this app and go back to the “Hi there” welcome screen.
Bypass Google Account from Moto 5G Ace – Last Steps
8. Now, again we have to follow the same steps. But this time, we will enable the Google Play Services app only.
Go to Emergency Information and then hit the Pencil icon.
9. Click on the “Name” and then hit the Image Icon and select “Choose an image”.
10. Tap the “Hamburger” menu, then push and hold on to “Photos” until you see “App Permissions”.
Hit the “Search Icon” from the App Permissions screen.
11. Type and search for Settings, then select “Settings” with app info from the results.
Go to the “Apps & notifications” section.
12. Hit “See all apps” and then open the “Google Play Services” application.
After that, tap “Enable” the Google Play Services app and then go back to the “Hi there” welcome screen again.

13. Now, “Skip” the Connect to Mobile Network page, and you see the “Copy apps data” page. Hit the “< Back” button to go to the Wi-Fi Network page.
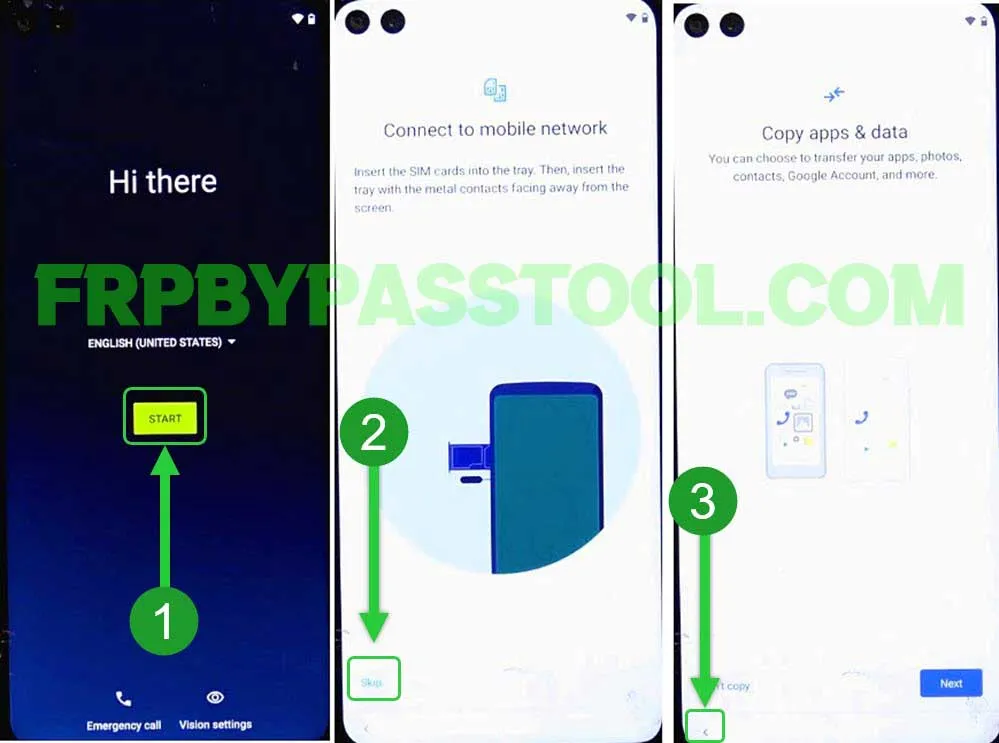
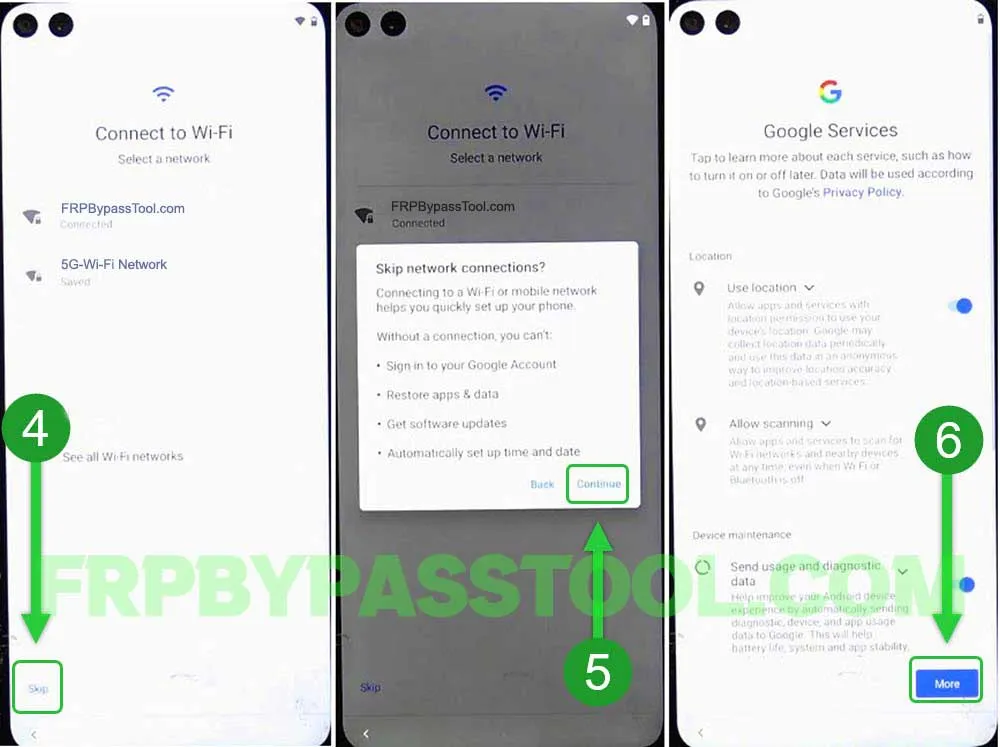
14. As you can see, now we have the “SKIP” button on the “Connect to Wi-Fi” page.
Tap on the “Skip” button, and then select “Continue”.
After that, you can simply complete the initial setup of your Motorola Moto phone without facing the Google Account Verification screen.
15. For now, it is better to Skip the “Set screen lock” feature.
However, you can set the screen lock after completing the initial setup.

16. Next, just complete the remaining steps of the initial setup of the Motorola Moto One 5G Ace smartphone.

Finally, the phone is now free from Google account verification and FRP lock.
Summary
To be honest, this is the simplest and easiest guide to bypass the FRP lock from the Motorola Moto One 5G Ace Android phone. This guide can easily bypass Google Lock from Motorola Android 13, 12, and 11 devices.
Remember, this guide works for almost all Motorola Android devices. If you are using an old Moto device with Android version 9, 8, 7, or even 6. You can still use this guide to easily bypass the FRP lock from your phone.
In case, you face any difficulties bypassing Google Lock from a Motorola One 5G Ace device. Then, you can comment below this post and I will try my best to help you out.