Motorola Moto E6i FRP Bypass Without PC Android 10, 11, and 12 guide is here after a long wait. We have been creating a lot of free guides to bypass Google account verification from Android devices. Today, we are creating the Motorola E6i FRP Bypass Without PC guide and it works for almost all Android versions.
Bypassing FRP lock from Motorola Android smartphones is not impossible and not as difficult as it looks. With the help of this method, anyone can easily bypass FRP lock from Motorola Android 12, 11, and Android 10 smartphones.
Generally, this is a universal guide and it is designed to work for all Android support patches and versions. Motorola FRP bypass Android 13, 12, 11, and Android 10 (Go Edition) is possible with just one guide. We tried our best to post as many free guides as possible to help the authentic smartphone owners.
Jump to
Motorola Moto E6i FRP Bypass Without PC Android 10, 11, and 12
Factory Reset Protection aka FRP lock is a security feature and it protects the data of a smartphone based on Android OS. It plays a crucial role in safeguarding the user’s important data after getting a Hard Factory Reset.
As we know, performing a Hard Factory Reset to any Smartphone device is to unlock the Password, PIN, Pattern lock, or any type of screen lock. Therefore, just after a device gets a Hard Factory Reset, it automatically activates the FRP lock to keep the device data safe.
Therefore, it asks for the synced Google account to unlock the device. This is the Google account that we used during the first initial setup of our phone.
However, most of the time we forget the Gmail ID or Password of that Google account that is synced to our device. In this case, the only possible way to unlock it is to bypass the FRP lock.
Moto E6i FRP Bypass Without PC and SIM Card – Complete Guide
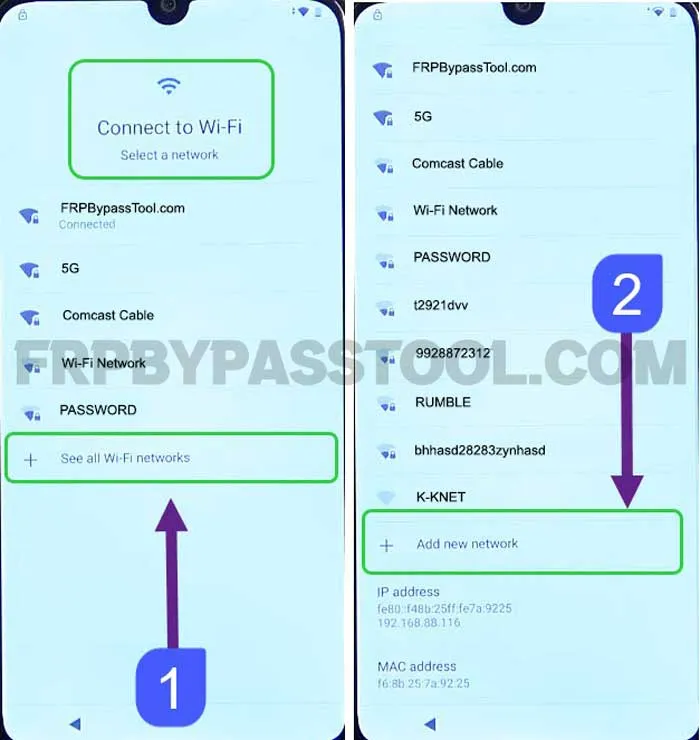
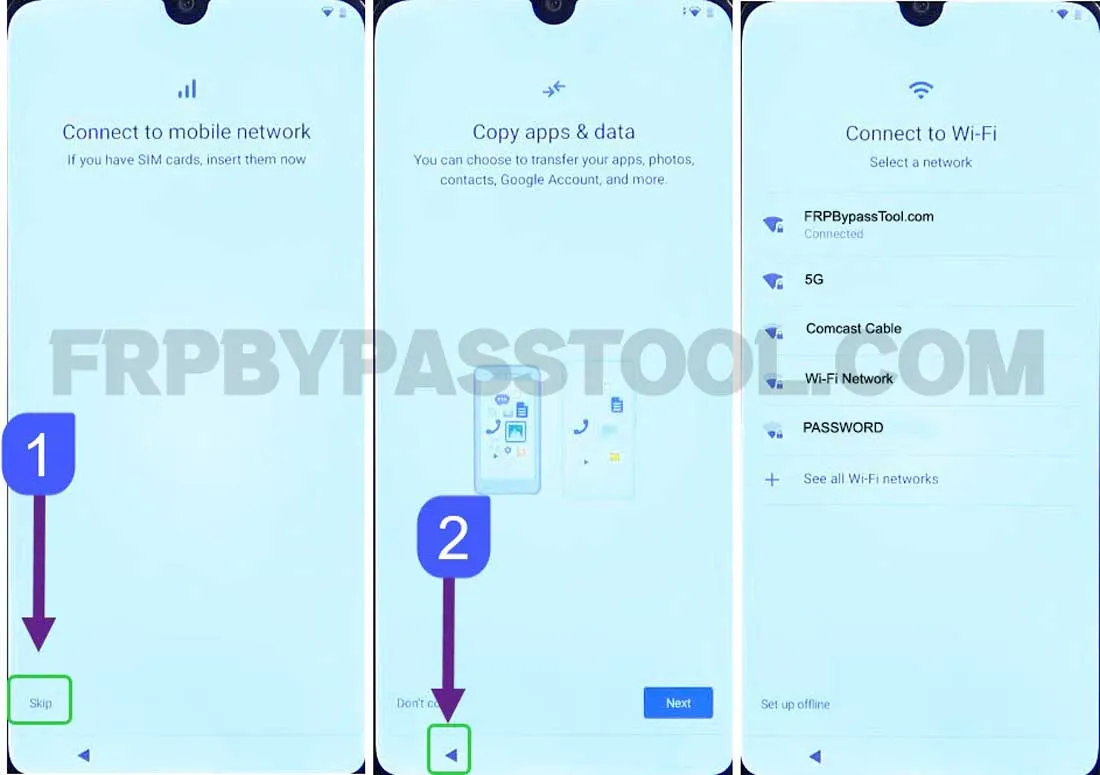
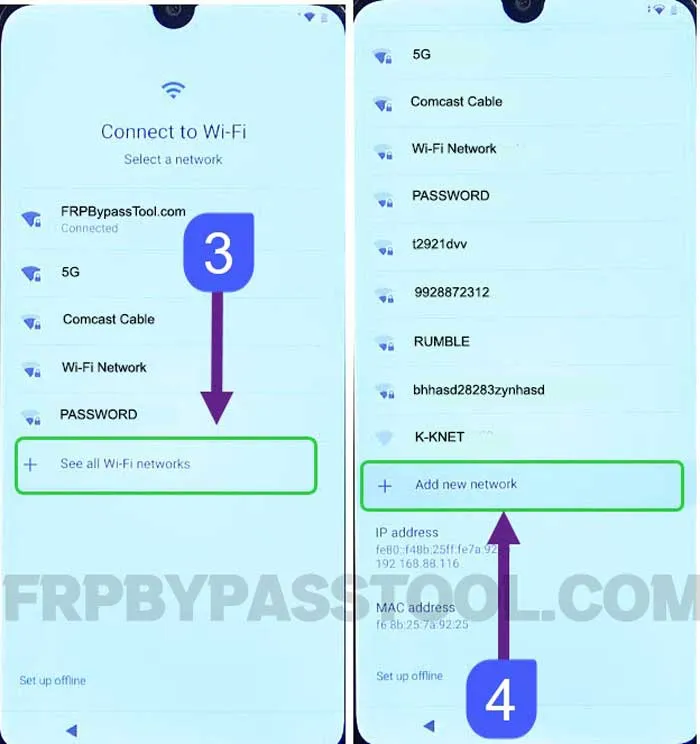
1. Start by connecting to a Wi-Fi network and then tap on “See all Wi-Fi networks”. Then select “Add new network”.
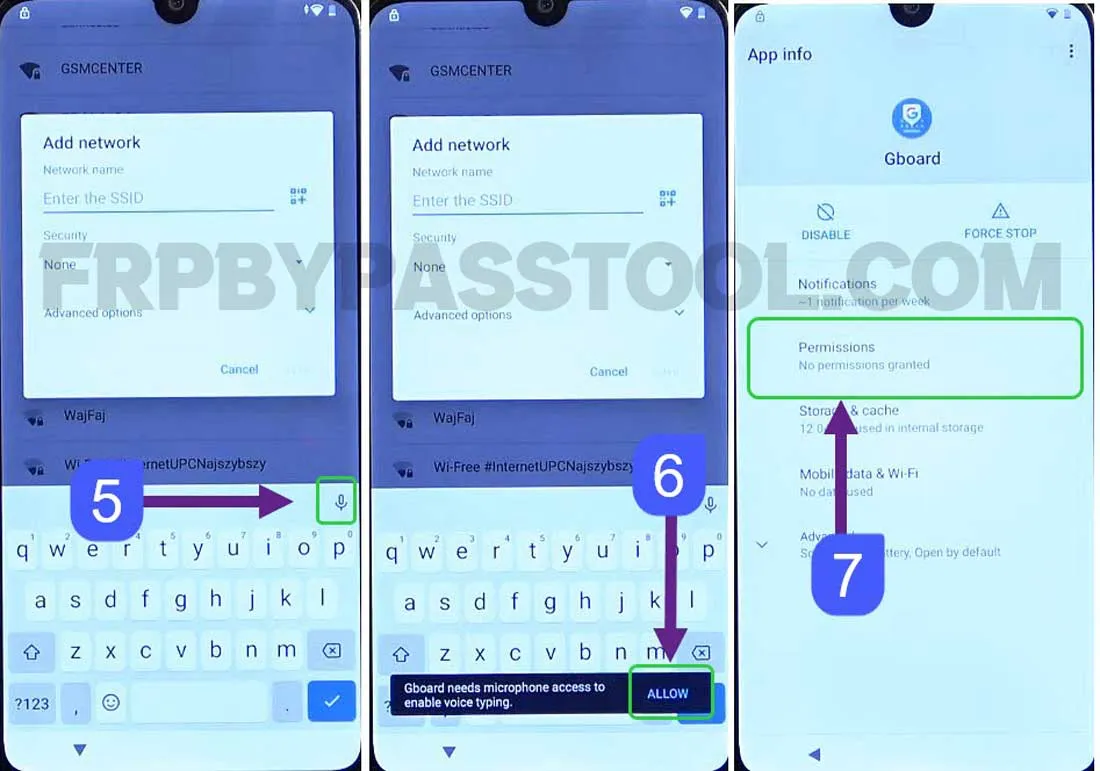
2. After that, a keyboard will appear on your screen. Simply tap on the “Microphone Icon” and then select “Deny”.
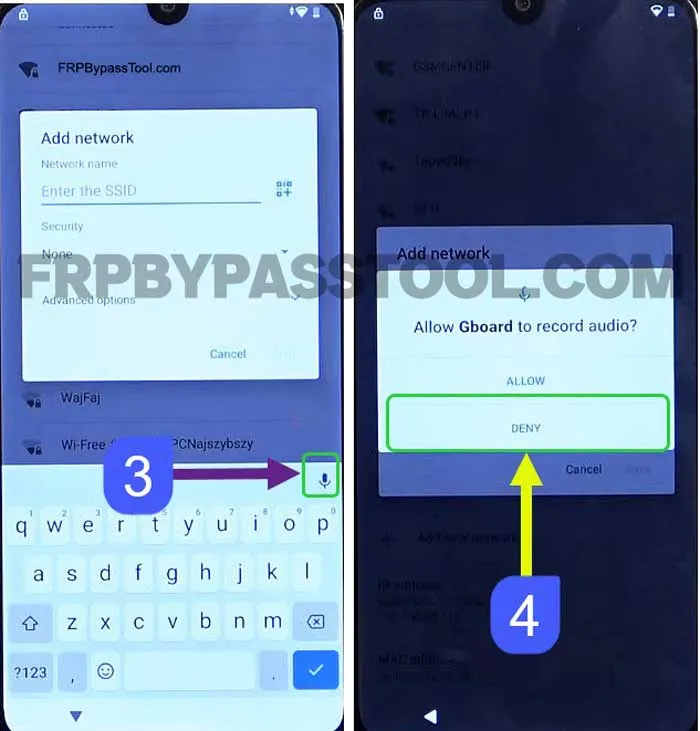
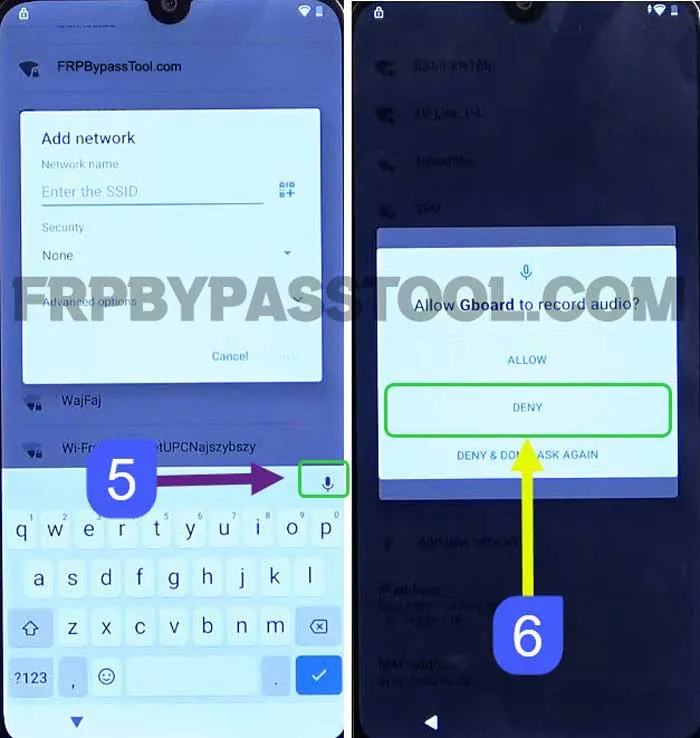
3. Again, tap on the “Mic Icon” and then again select “Deny”.
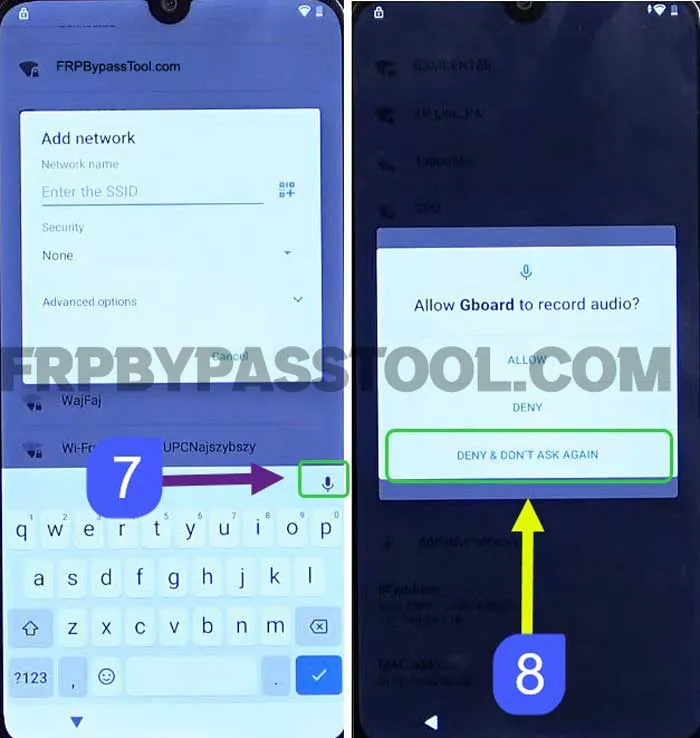
4. Now this time, when you tap on the “Mic Icon”, select “Deny and Don’t Ask Again”. In case you don’t see this option, then tap on “Deny” only.
5. Next, the “Mic Icon” will turn transparent, tap on it and then select “Allow”.
Doing so will open the Gboard App info, and tap on “Permissions”.
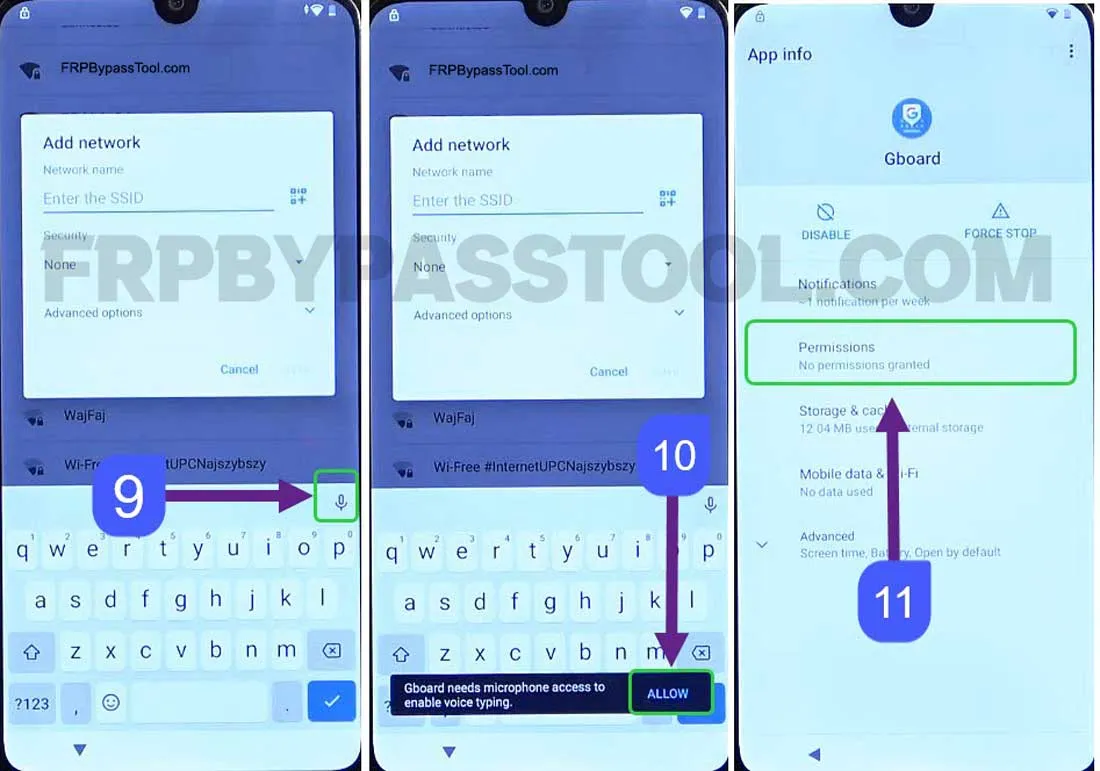
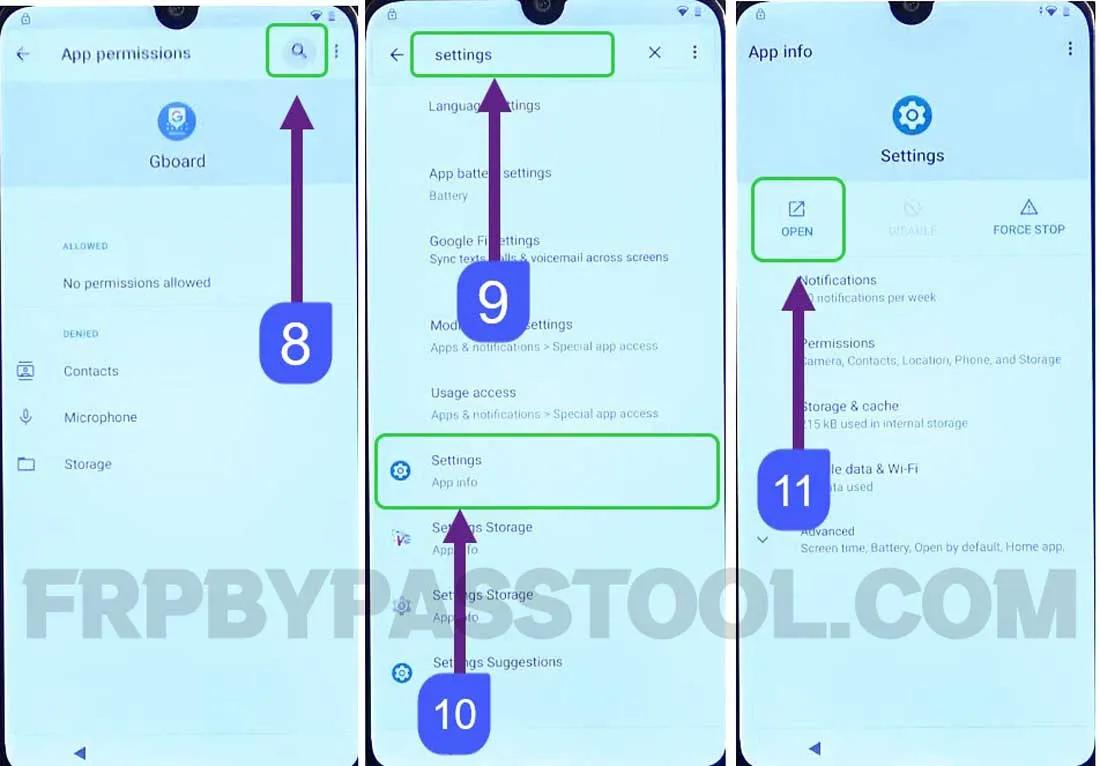
6. After that, click on the “Search icon” and then type “Settings”.
From here, we need to open the “Settings” with App Info. After opening the Settings, tap on the “OPEN” button.
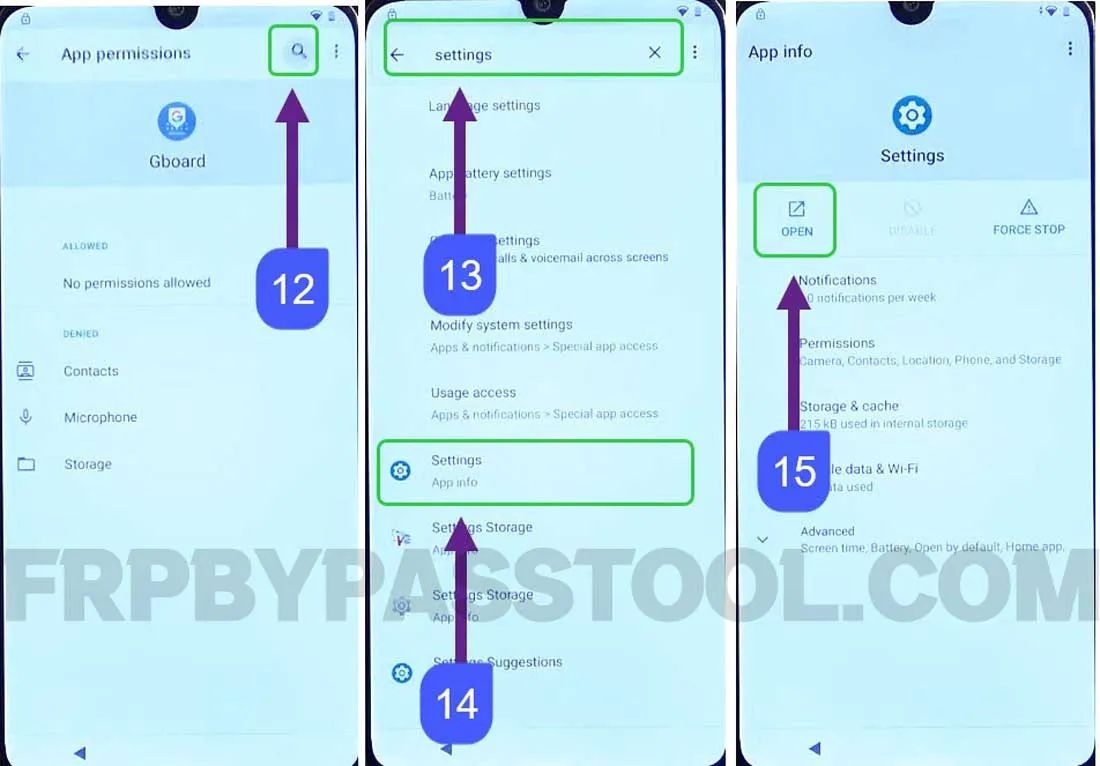
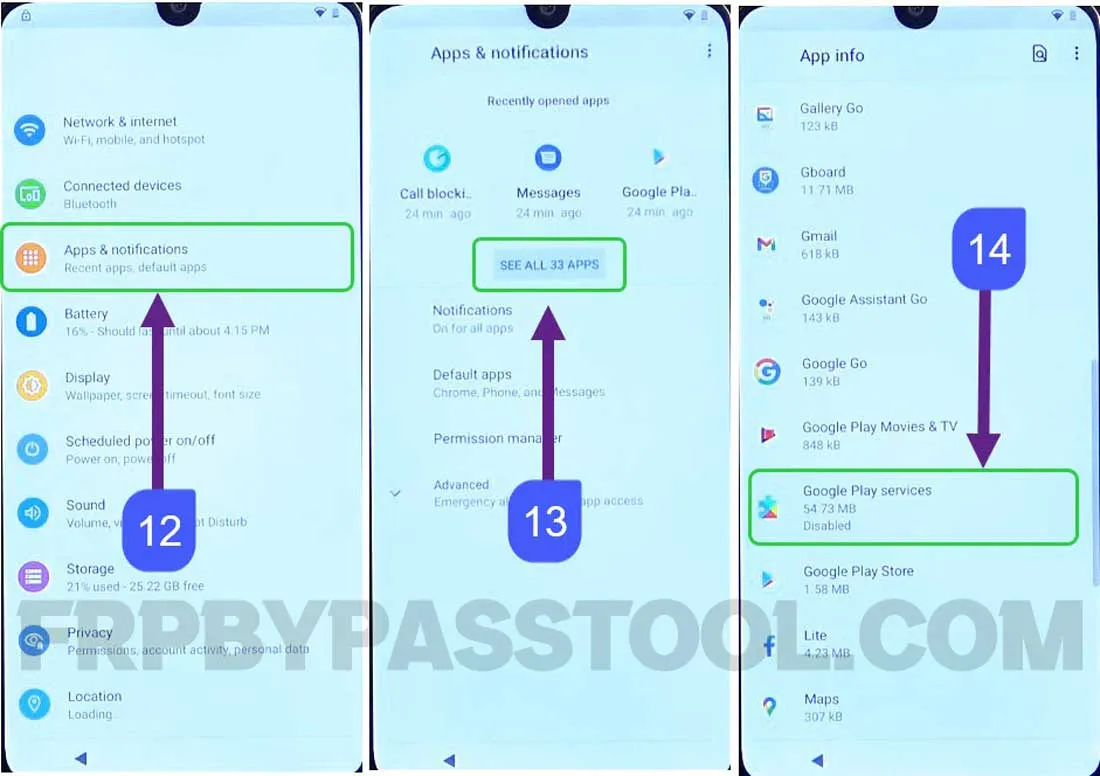
7. Inside settings, go to “Apps and notifications” and then select “App info”. In case you see “See all apps” then tap on that button inside the app info.
Once you see “App info” on your Motorola phone, swipe up and then open the “Google Play Services” app.
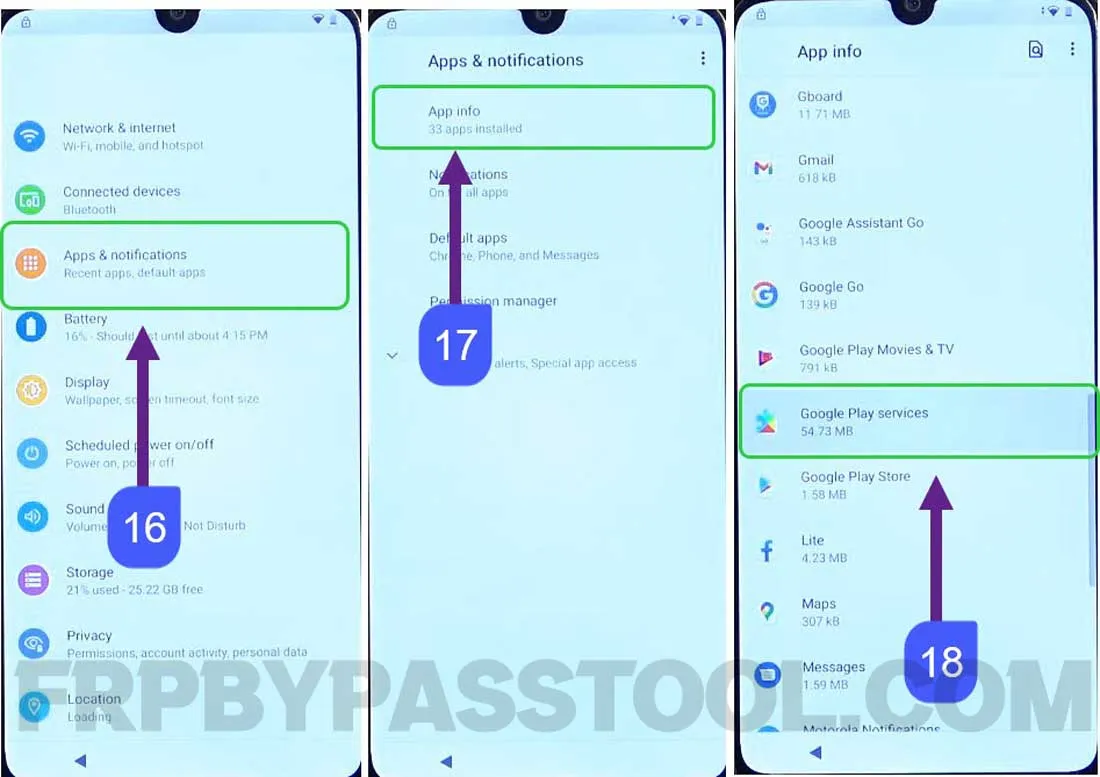
(If you don’t see “Google Play Services” then, tap on the “:” three dots from the top right corner and select “Show System Apps”.)
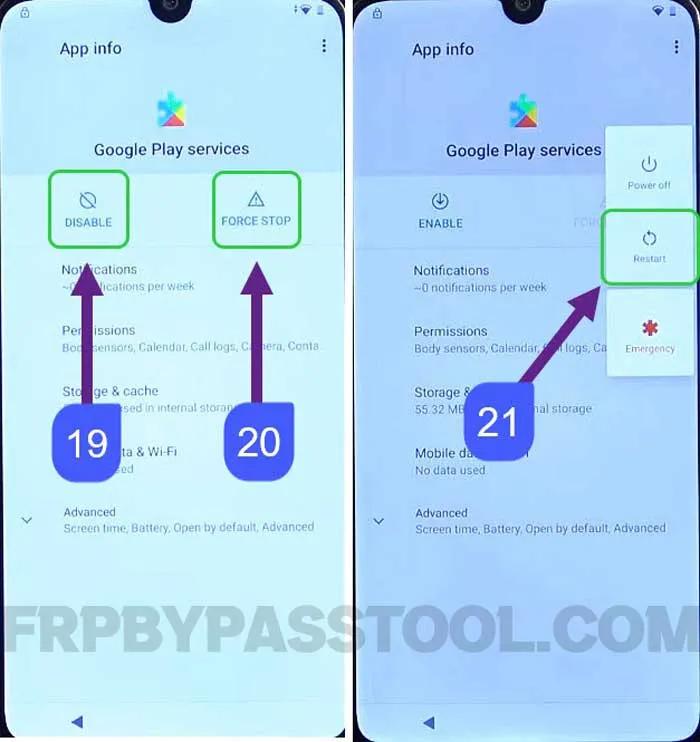
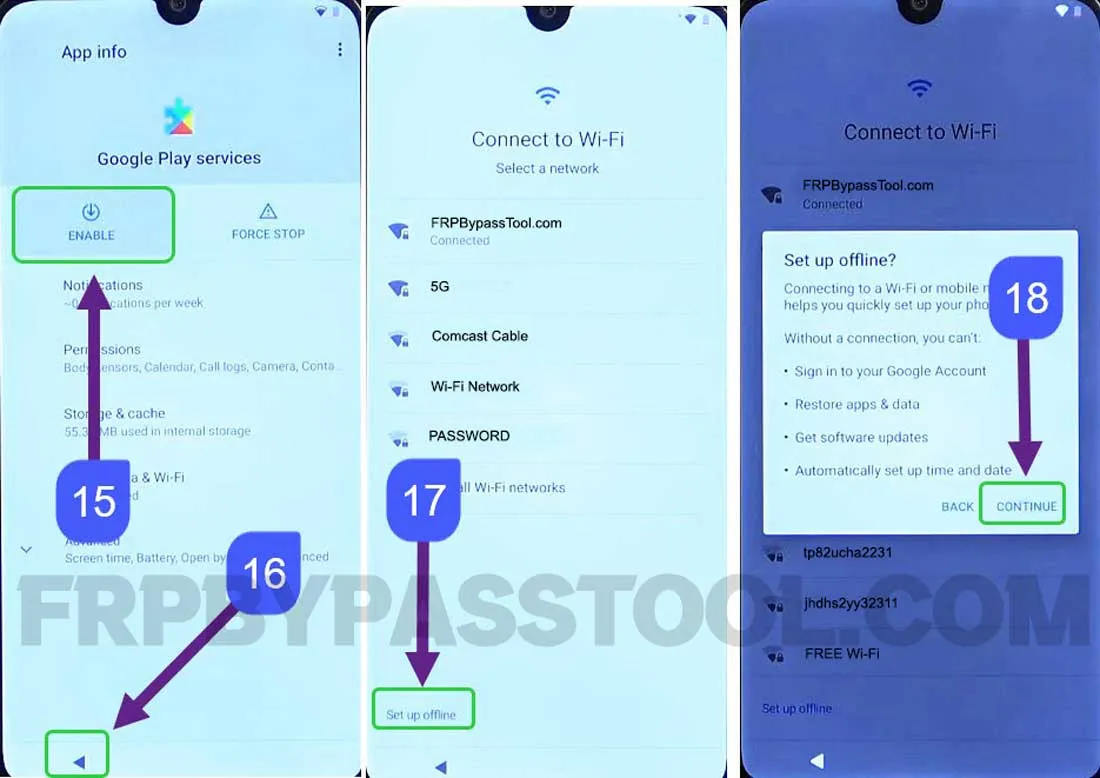
8. Next, first “Disable” and then “Force Stop” the Google Play Services application.
After that, push the Power button and hit “Restart” to restart your phone.
9. Skip the “Connect to mobile network” and when you see “Copy apps and data” tap the “< Back” button to go to the “Connect to Wi-Fi” page.
As you can see, the “Set up offline” option is activated.
10. Now, before proceeding with the initial setup, we need to Enable the Google Play Services again.
To do that, simply we need to open the “Add new network” keyboard.
IMPORTANT STEPS
11. After that, tap on the “Mic icon” and select “Allow”. This will open the Gboard page, tap on “Permissions”.
12. Next, tap on the Search bar and type “Settings”. Then open the Settings with App info.
13. Now, select “Apps and notification” and then tap on “See all apps”.
Then, swipe up and look for “Google Play Services”.
14. First “Enable” the Google Play Services app, then go back to the Wi-Fi page.
Once you reach the “Connect to Wi-Fi” screen, tap on the “Set up offline” button.
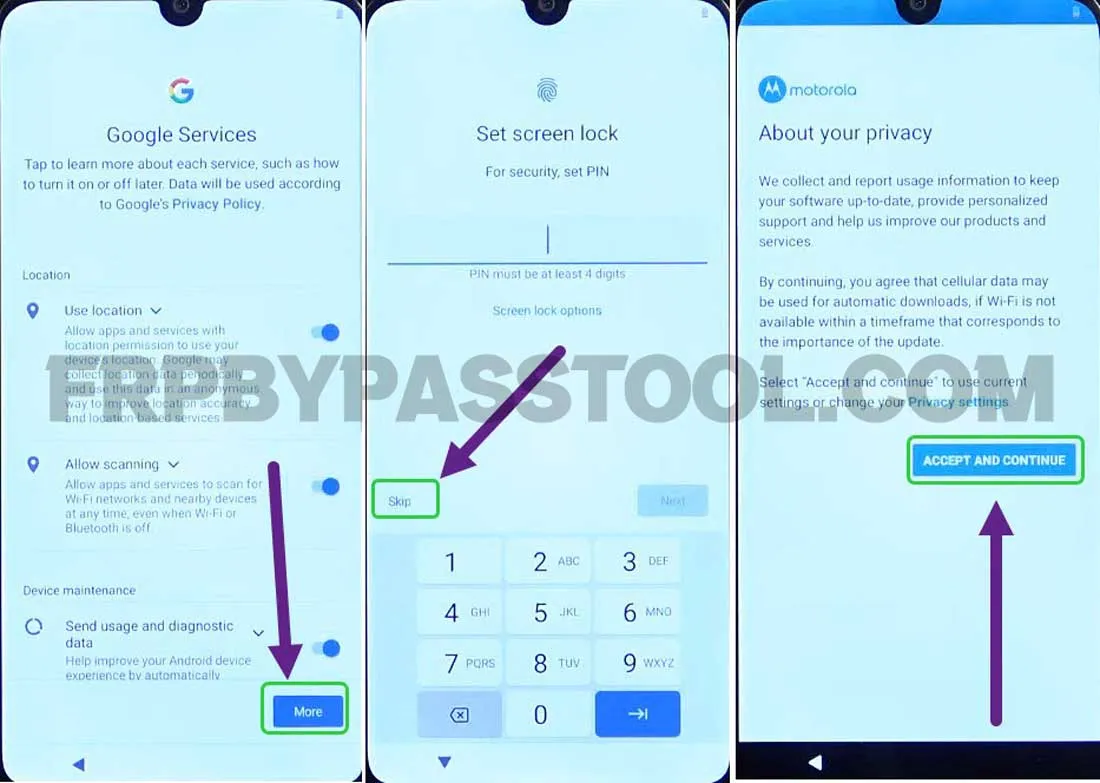
15. Then, simply complete the initial setup, and if you see “Set screen lock” then SKIP it.
16. After completing the Initial Setup, you will be able to use your Motorola Moto E6i phone once again.
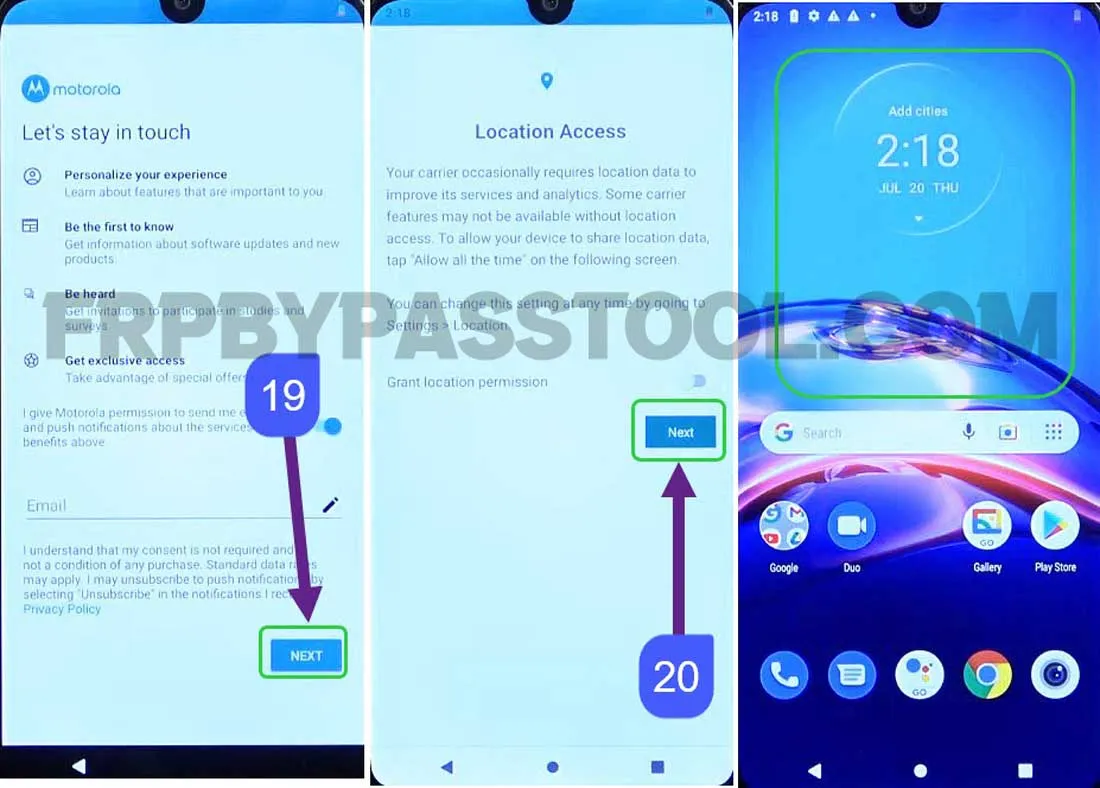
But, we still have to Factory Reset this device, as it is still synced with the previously submitted Google Account. Also, the Screen lock or Pattern lock was set before.
To remove both locks completely, we have to perform a Factory Reset.
Motorola Moto E6i Android 10 (Go Edition) Factory Reset
1. Swipe down and open the notification bar then select “Settings Gear Icon” to open the Settings of your phone.
2. Then, swipe up and go to the “System”.

3. Now, select “Advanced” and it will bring up the option for “Reset Options”.

4. Inside reset options, tap on the “Erase all data (Factory Reset)” option.
5. Next, it will show the “Factory Reset” screen as you can see in the details.
It will remove “Your Google Account” and that’s what we need to do.
6. Finally, tap on the “Erase all data” button to start the Factory Reset procedure.
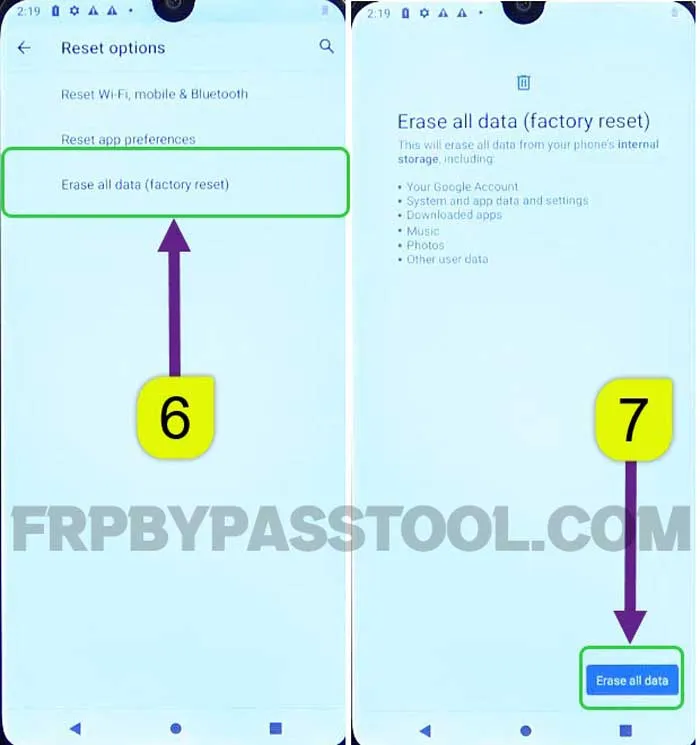
7. It will take 3 to 5 minutes to complete the Factory Reset procedure. After that, you can easily complete the initial setup without facing the Screen lock and Google verification lock.
Conclusion
In the end, I hope you have successfully bypassed the Google account verification lock from Motorola Moto E6i Smartphone. This is a free guide and it works for almost all Android versions. So, if you have updated the Android version of Moto E6i device, then still you can use this guide to bypass Google lock.