TFM Tool Pro v2.0.4 is very useful and quite handy when it comes to removing FRP lock and bypass Google verification from Samsung Galaxy devices.
TFM Main Module Cracked v2.0.4 is available to download for absolutely free on the FRPBypassTool.com website.
As we know, TFM FRP Tool is pretty accurate in removing Factory reset protection, mostly Samsung users prefer using the TFM tool to unlock their devices.
Back in the days, Octoplus and SamFirm FRP tool was very popular and these 2 FRP tools really do their magic. But, in 2021 TFM FRP unlock Tool works absolutely amazing, especially in Samsung phones.
Jump to
- 1 TFM Tool Pro 2.0.4 FRP unlock Tool – Step by step Guide
- 1.1 TFM TOOL PRO 2.0.0 DOWNLOAD FREE WITH COMPLETE GUIDE:
- 1.2 Bypass Google Account with v2.0.0
- 1.3 Reboot to Recovery Mode Guide:
- 1.4 INSTALL AND UPDATE ANDROID ADB DRIVERS ON WINDOWS:
- 1.5 LAST 10 STEPS TO UNLOCK ANDROID DEVICE TFM TOOL PRO 2.0
- 1.6 Now follow this step, as it is very crucial:
- 1.7 Conclusion:
TFM Tool Pro 2.0.4 FRP unlock Tool – Step by step Guide
1. Get Samsung USB drivers and TFM Tool Pro v2.0.4 on the desktop of your PC.
- Download TFM Main Module Cracked v2.0.4 Full Setup.
- (DOWNLOAD LINK)
- PASSWORD: frpbypasstool.com
- Samsung USB Drivers Latest Version.
- (DOWNLOAD SAMSUNG USB DRIVERS)
- (DOWNLOAD LINK 2)
2. Extract the TFM tool to your desktop and right-click on the setup and RUN it as administrator.
3. Click and check on “I agree to the license” >> then click on the INSTALL button.
")
4. Once the TFM FRP tool installs, click on the Finish button.

5. Go to your desktop and you will see the “Main Module V2.0.4” icon, right-click on it and click on “Run as administrator”.

6. Inside TFM Tool >> click on “SAMSUNG” from the taskbar and then >> click on the “Module” drop-down menu.
Select your Samsung Galaxy device model number.
Click on UNLOCK option.
 7. Now, you need to boot your Samsung Galaxy phone into the Download Mode.
Push and hold (Volume Down + Power button + Home button) at the same time.
Release all the buttons, once you see Blue Screen of Download mode.

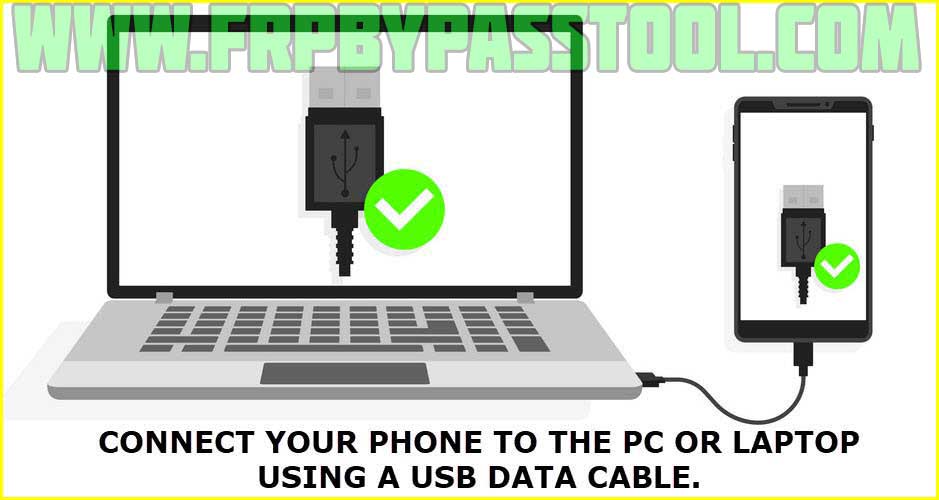
8. Now, connect your Samsung Galaxy phone to your computer with the help of a USB data cable.
9. Once the Samsung phone is connected >> click on SCAN button >> then click the “Remove FRP/Bypass FRP” button.
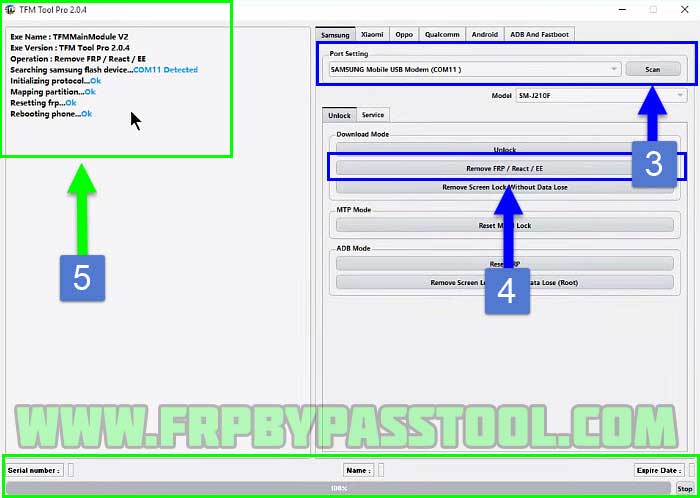
10. Doing this, will start the procedure of removing the FRP lock from your Samsung Galaxy android device.
11. However, this operation will take 10 to 15 minutes to finish removing the Google verification lock aka FRP lock from your device.
TFM TOOL PRO 2.0.0 DOWNLOAD FREE WITH COMPLETE GUIDE:
Bypass Google lock from Android phone and tablet using TFM TOOL PRO. This is a complete guide to remove FRP lock and bypass Google verification from any Android smartphone and tablet. Although, this is a universal guide that supports Android v12, v11, v10 and also support previous Android version 9, 8 and 7.
That been said, bypassing Google lock from Android devices having latest Android patch is a bit difficult than removing FRP lock from previous Android patch devices.
Therefore, we always have to work really hard to discover new ways to remove this lock. After applying different techniques on so many Android devices having Android v12, Android v11 and also with Android v10 and v9.
Currently, the latest Android patch is v12, and with every new update it is becoming difficult to bypass FRP lock from Android devices. On the other hand, that’s also good for the security of our phone.
Important note, this guide is only for the real Android device owners. The owners who forgot about the Gmail ID or Password of their Google account which is synced to their devices. Please do not apply this method on stolen devices.
Bypass Google Account with v2.0.0
Firstly, we are going to use TFM TOOL PRO v2.0.0 to remove the screen lock, password lock, pattern lock or fingerprint lock from our Android device. This tool commands our phone for rebooting into the system recovery mode. Doing so, we can perform a “Wipe data factory reset” and it will remove the screen lock completely from the device.
Secondly, after removing the Screen lock, we need to remove FRP lock or Google account verification lock. For this method, I will show you a unique way to bypass Google lock from any Android device. Especially, if you are removing lock from a latest patch like, Android v12 or v11.
That been said, as this is a latest method to remove Factory Reset Protection, you can apply it to any Android version from v12 to v7. And this single method will work for all of them.
- Best tool for MTK Devices: MediaTek Universal Tool v2 Free Download for Windows 32/64 Bit OS
Reboot to Recovery Mode Guide:
- DIRECT DOWNLOAD TFM TOOL 2.0.0
- Password: frpbypasstool.com
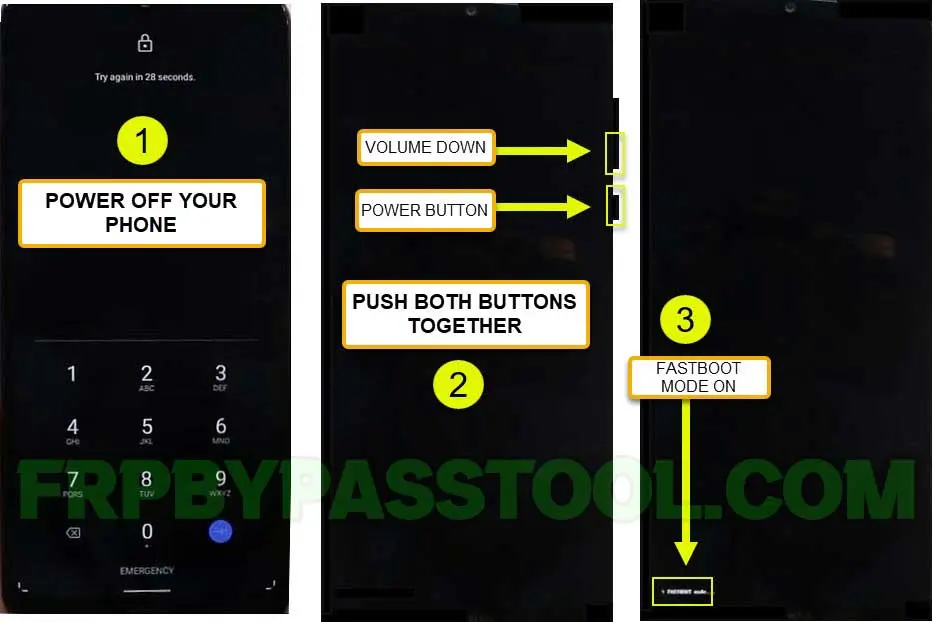
1. Power off your device and push and hold “Volume Down + Power Button” together to boot your phone into the Fastboot mode.
2. Download and install latest Android ADB Drivers to your computer.
3. Extract the Adb Drivers to your desktop.
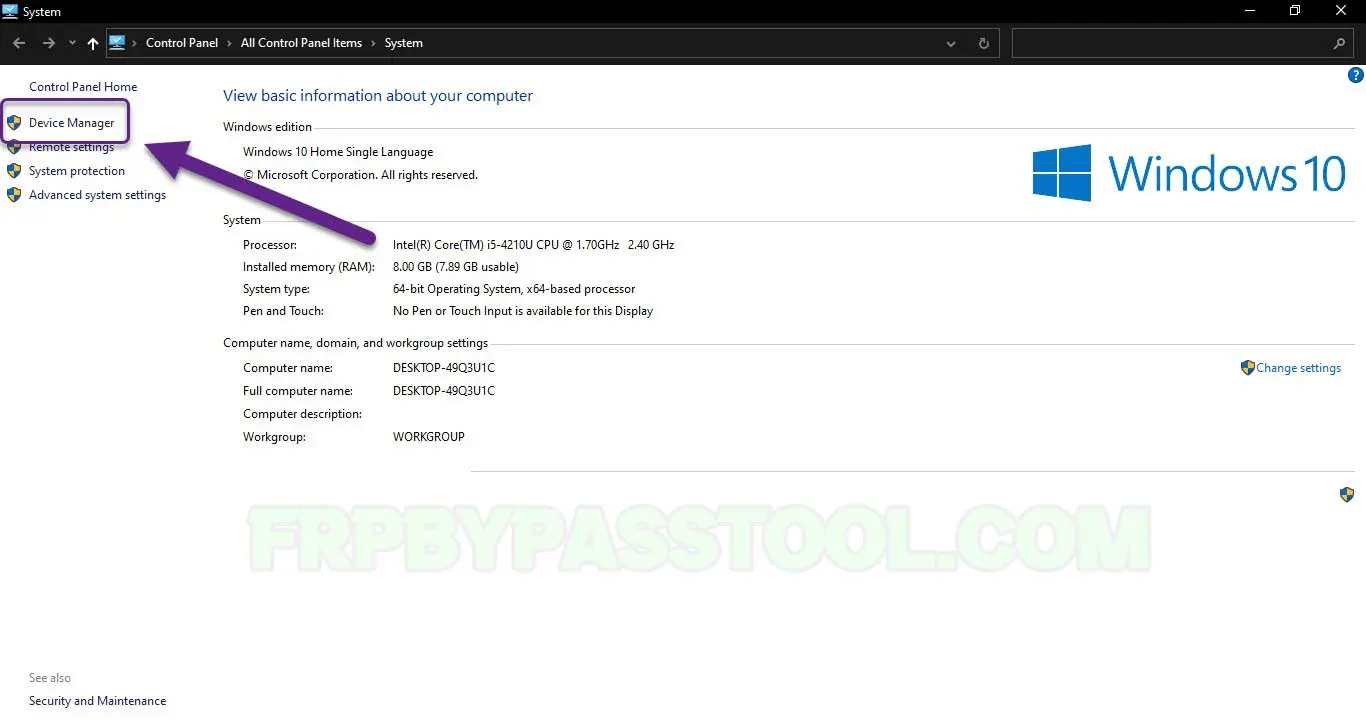
4. Now open the Device Manager. Go to “This PC” or “My Computer” then right click anywhere and then click on “Properties”.
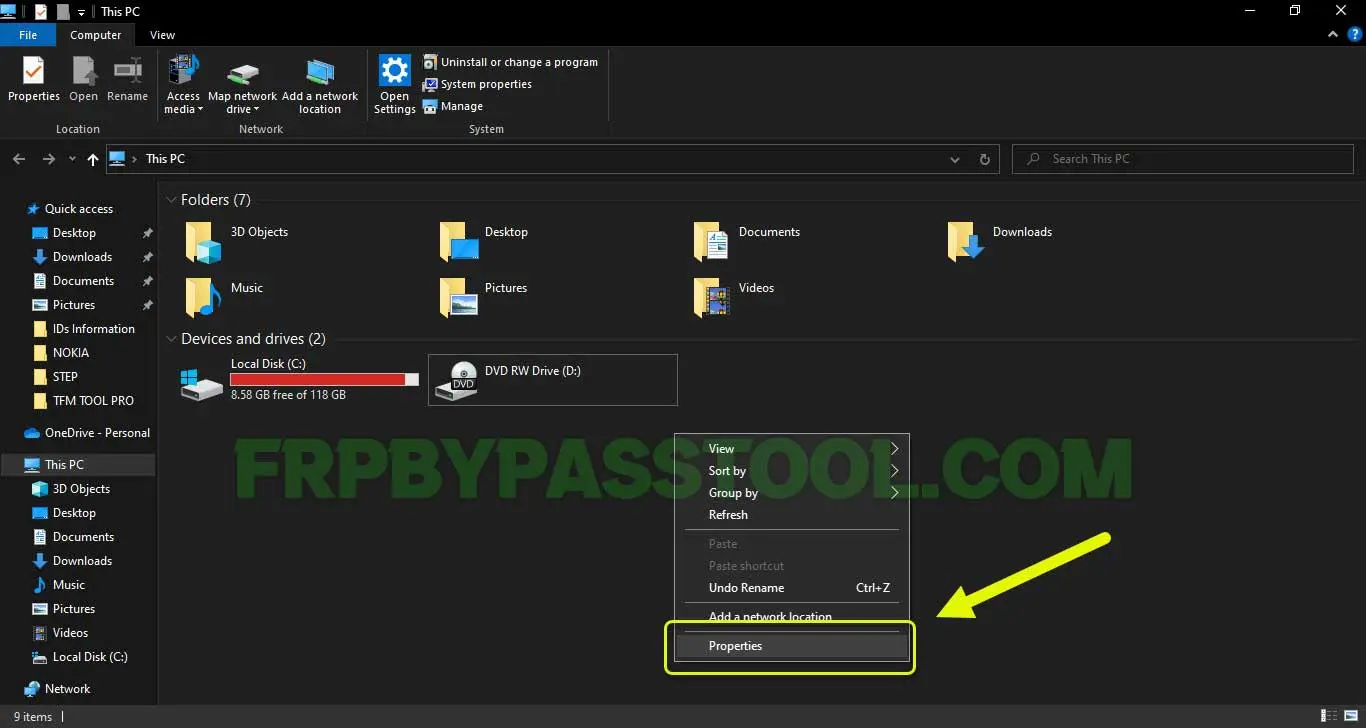
After that, from the top right corner click on “Device Manager”.
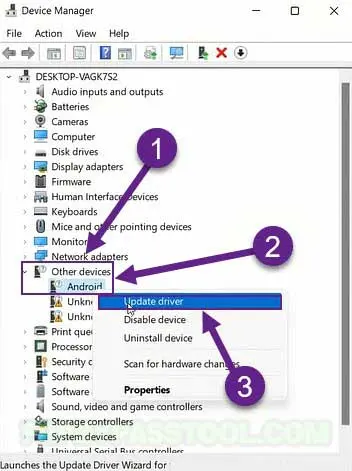
5. Once you open it, click on “Other Devices” make sure your Android smartphone is connected to the PC. Then right click on “Android” and then click “Update Driver”.
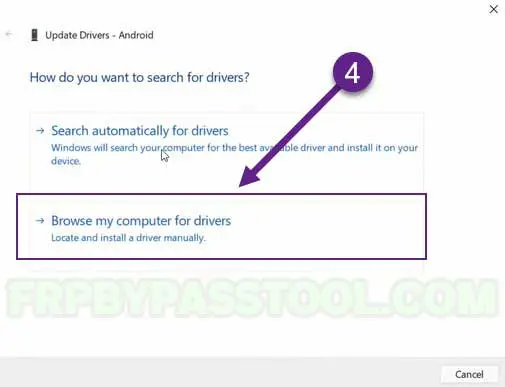
6. Browse my computer for drivers, select this option.
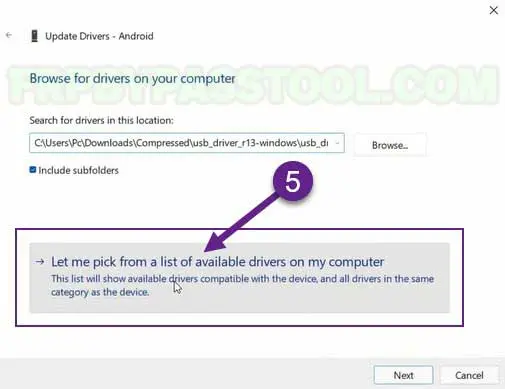
7. Then click on “Let me pick from a list of available drivers on my computer”.
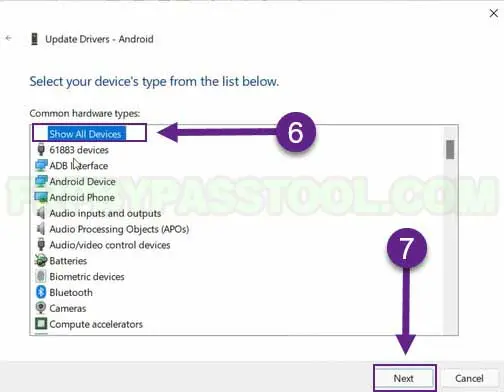
8. Select “Show All Device” and then click on Next.
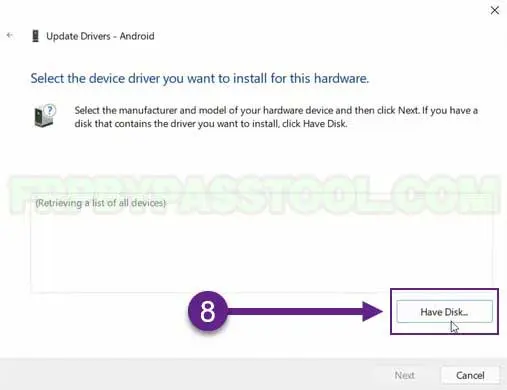
9. After that, click on “Have Disk” to open latest version of ADB Android drivers.
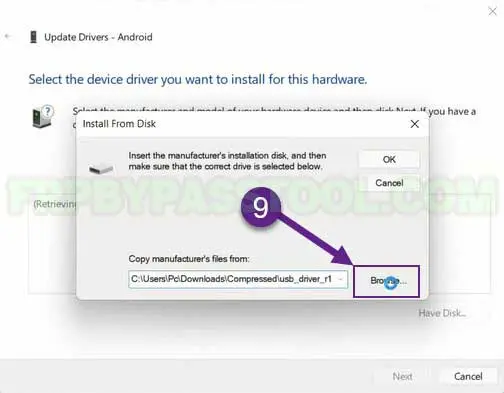
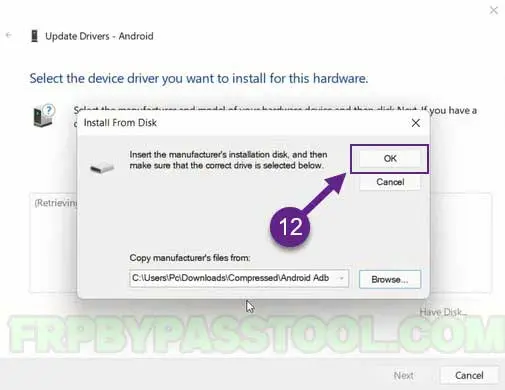
10. A popup window will appear, click on Browse.
INSTALL AND UPDATE ANDROID ADB DRIVERS ON WINDOWS:
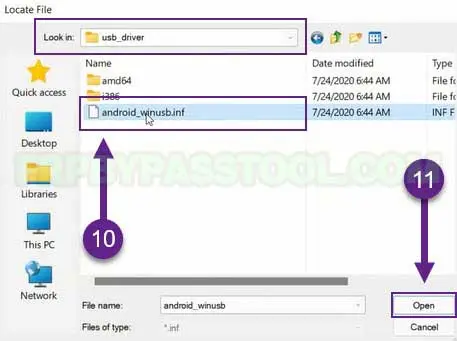
11. Here, you need to open the “Android ADB Drivers” folder which you extracted on your desktop after the download.
Go to “USB_Driver” folder and then open “Android_Winsub.inf” file.
12. Once you upload the file, click on “OK”.
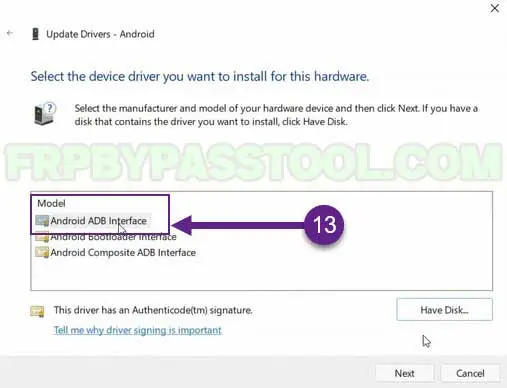
13. Select the device driver you want to install, click on “Android ADB Interface” and then click Next.
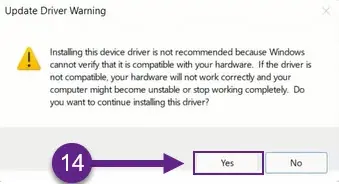
14. In case, you see “Update Driver Warning” just click on “YES” and the installation of your drivers will begin.
15. Close the installation window once you sucessfully installed and updated the drivers.
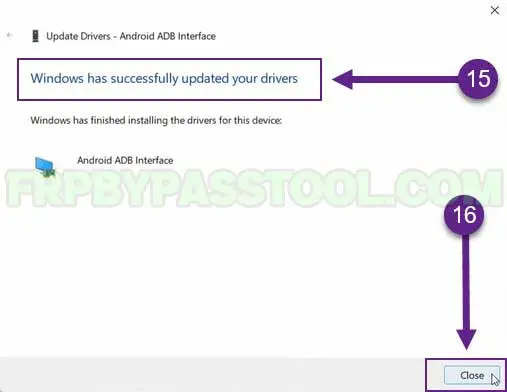
16. Now, as you can see, we have a new “Android Phone” prompt and inside it we can see “Android ADB Interface”.

That means, the latest Android ADB Drivers successfully updated to your pc.
17. Finally, its time to install the “TFM TOOM PRO 2.0.0” version.
(DOWNLOAD LINK FOR TFM TOOL PRO 2.0 WITHOUT PASSWORD IS GIVEN IN THE FIRST STEP OF THIS GUIDE)
18. To make the installation process smoother, we need to deactivate the Real-time protection.
LAST 10 STEPS TO UNLOCK ANDROID DEVICE TFM TOOL PRO 2.0
19. Open the Windows Security settings, by clicking on the “Windows Defender Icon” from the taskbar.
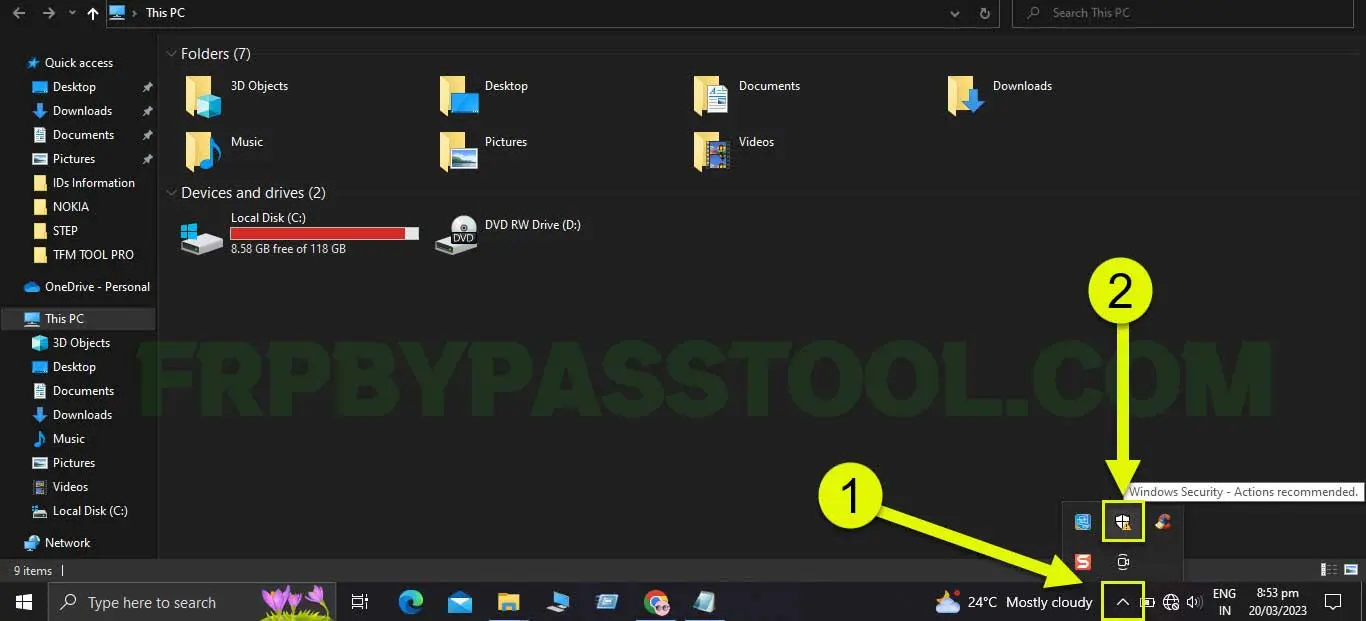
Click on “Virus & threat protection”.
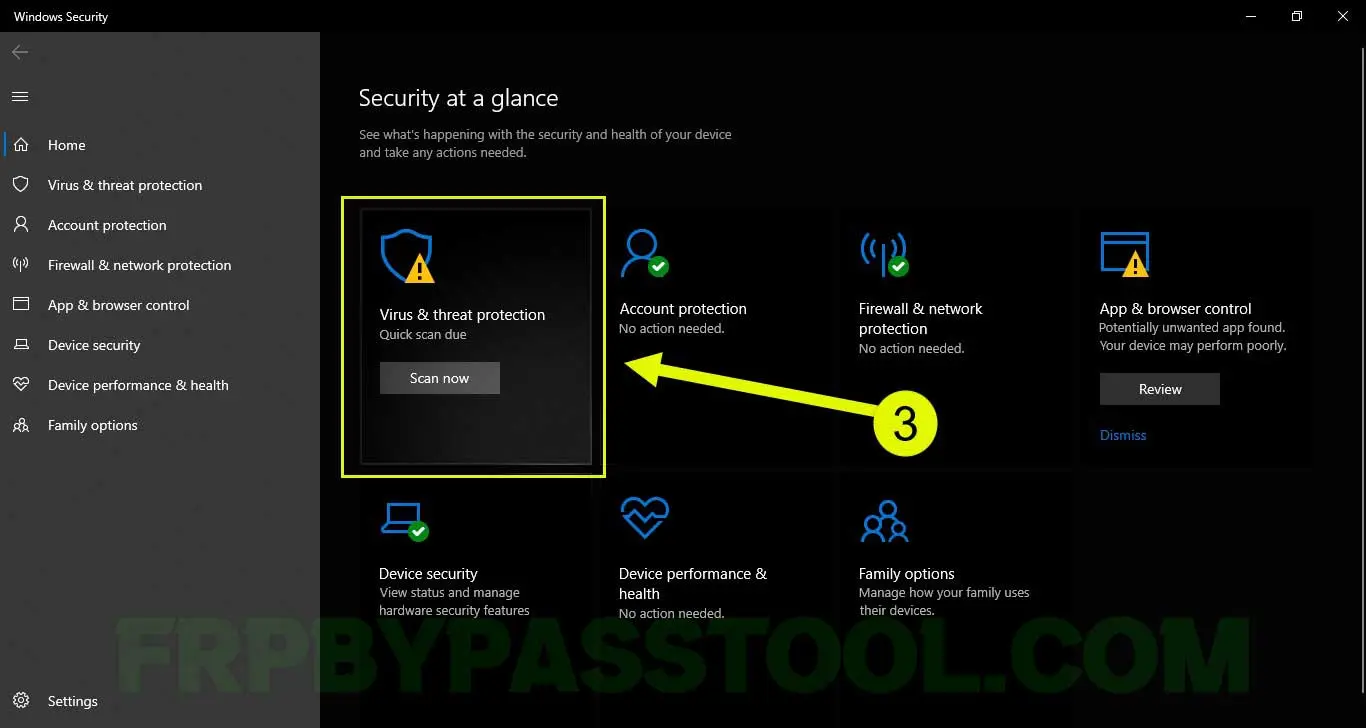
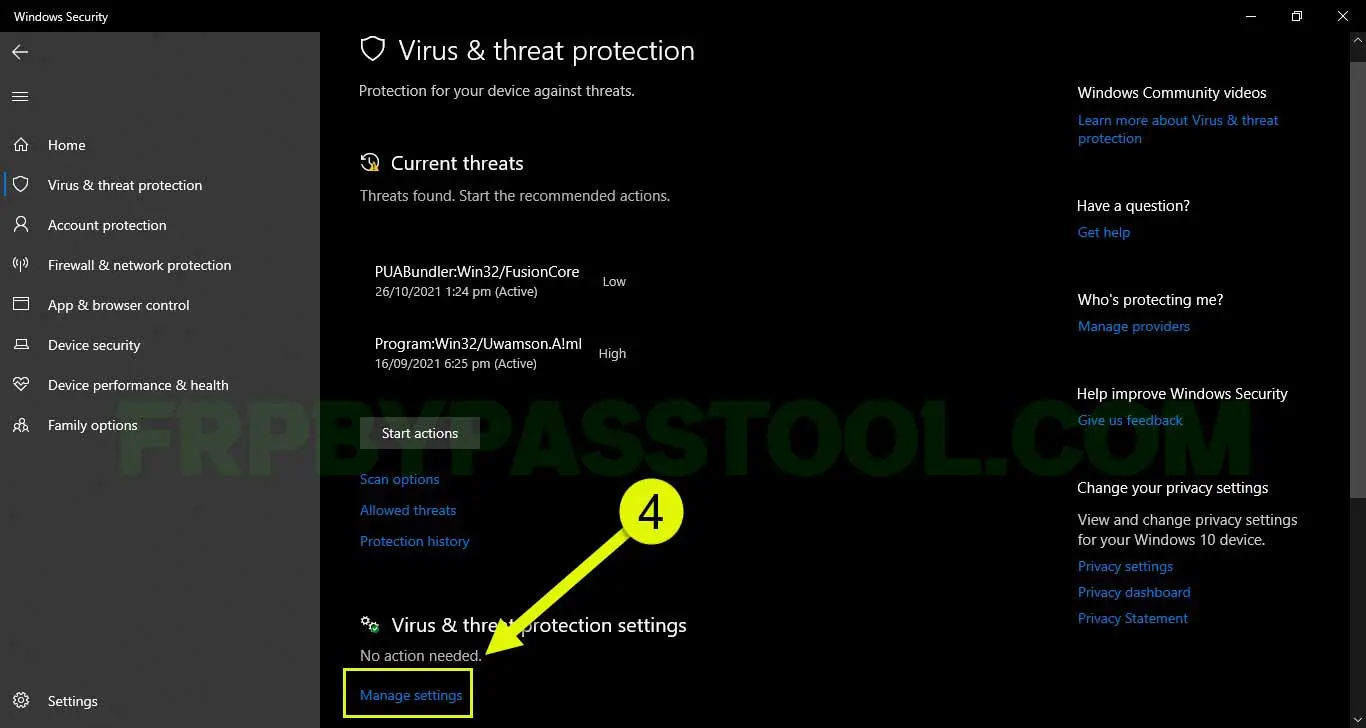
20. Then click on “Manage Settings” of Virus & Threat Protection settings.
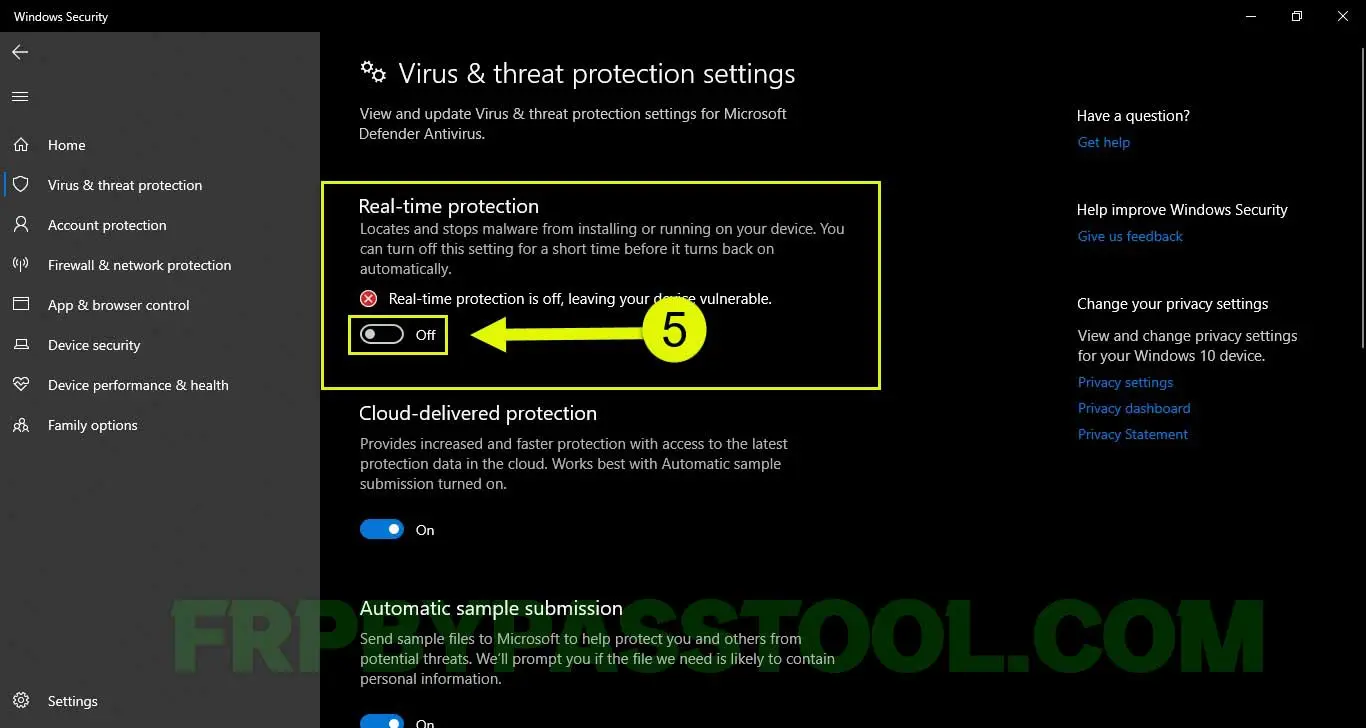
21. Here, you need to switch off the “Real-time Protection”.
22. After that, go back to the “TFM TOOL Pro v2.0.0” file and extract it to your desktop.
- Then go to the folder, and open “Loader”.
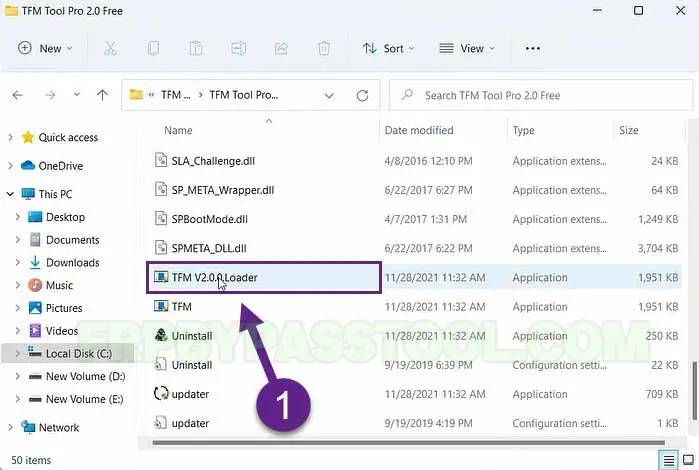
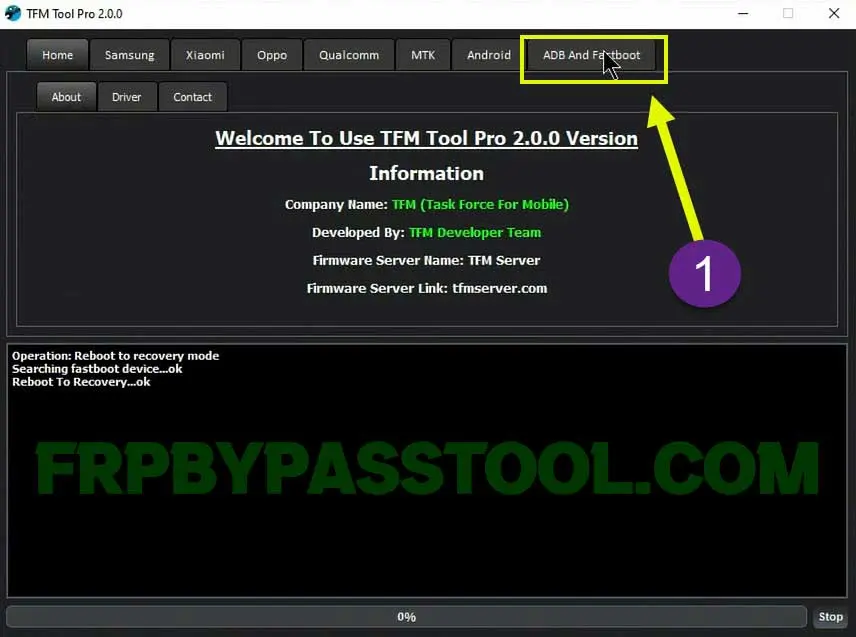
23. The TFM TOOL Pro will start to open.

24. Once you see the TFM Tool on your screen, go to “ADB and Fastboot” tab.
25. Then click on “Fastboot” tab, and then click “Reboot to Recovery Mode” button inside the tool.
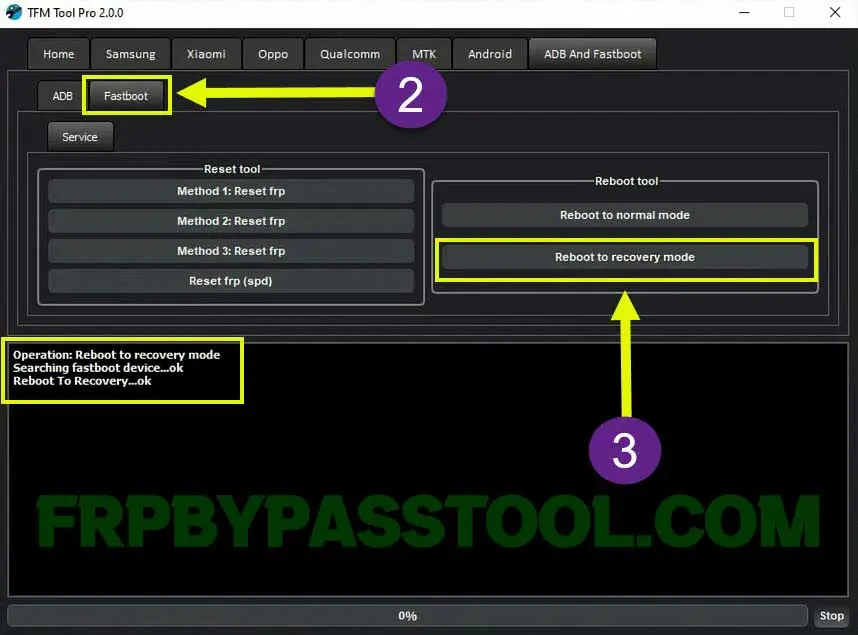
In a few seconds, this tool will boot your Android device to Recovery mode.
26. Once you see “No Command” message with Android on your phone’s screen. Disconnect the USB data cable.
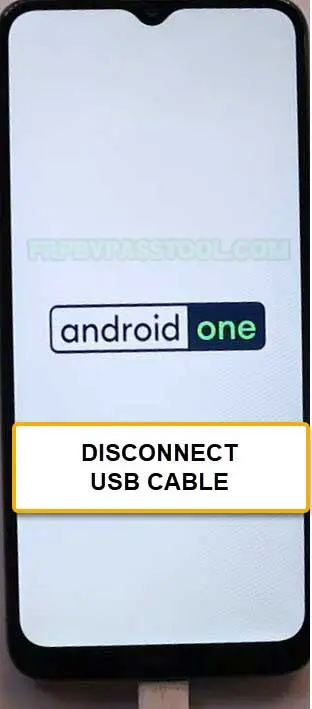
Now follow this step, as it is very crucial:
Firstly, Push Power Button and then quickly push Volume UP button.
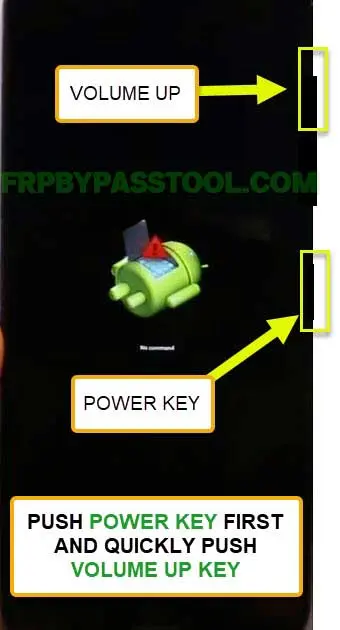
(You may need to try doing this several times, until your device boots into the Recovery mode.)
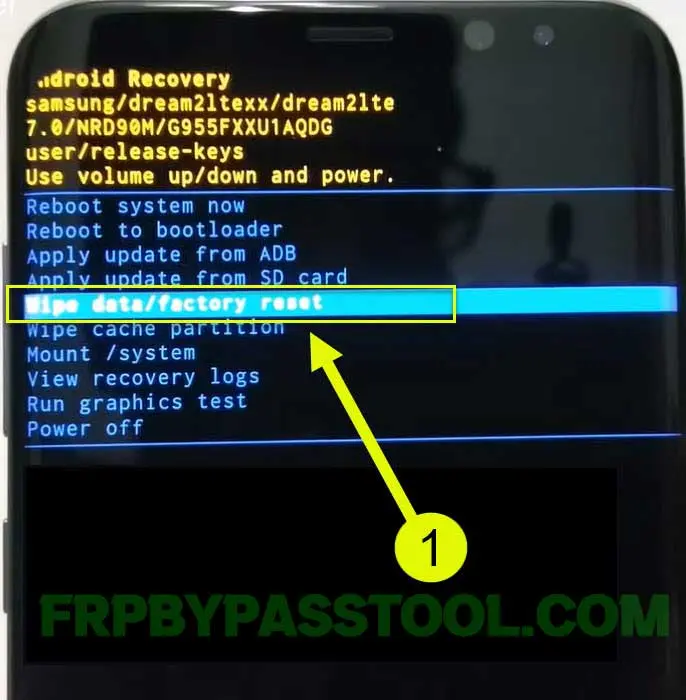
27. Once you see “Android Recovery” screen, push Volume UP and Down keys to navigate the options and push Power Button to select it.
Push Volume Down key to navigate to “Wipe data/Factory Reset” then push Power button.
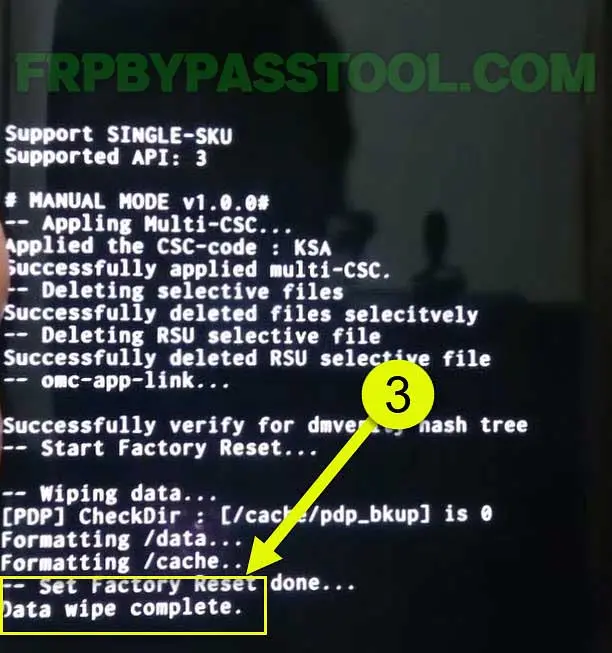
28. Now press Volume Down Key again and select Yes by pressing the Power button.

29. Now, the operation of removing data from your phone will start to work.
- Push Power button to Reboot System.
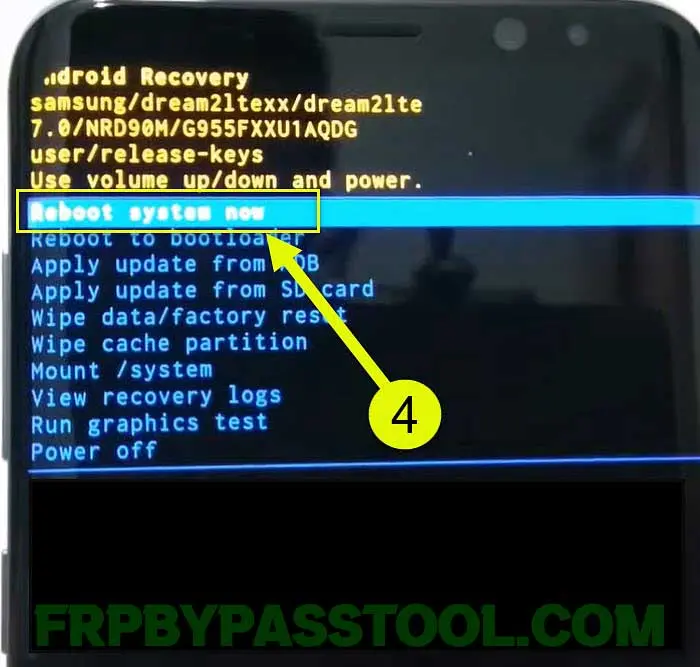
30. Just like that, it will remove the Password, PIN lock, or any type of Screen lock from your device.
Conclusion:
These are the very simple steps which you can follow to remove FRP and Google verification lock from your Android phone and tablet. With the help of TFM Tool Pro v2.0.4 which is the latest version of TFM and it can be downloaded for free. If you have anything to ask from me, please ask me in the comment section.
Password please
Winrar File Pass: frpbypasstool.com
senha incorreta, por favor corrigir!
I have removed the Password from the file, please download again.
password please
I have removed the Password from the tool, please download and install freely.
[www.frpbypasstool.com] nao corresponde amigo!
I have removed the Password from the tool, please download and install freely.
This password not work
The Password has been removed from the file, now you can download it and use it withoiut entering password.
“www.frpbypasstool.com” is incorrect. What’s the correct password??
What’s the password?? http://www.frpbypasstool.com is incorrect
the given password http://www.frpbypasstool.com is wrong. What’s the correct password??
http://www.frpfilebypass.com is incorrect. What’s the correct password please??
Please download it again, I have removed the Password from the file.
the password corresponds, I get an error
La contraseña no es correcta
What is the zip file password
ZIP File Password: [www.frpbypasstool.com]
Password
To unzip TFM tool pro, use this Password: [www.frpbypasstool.com]
password doesn’t work
Please check again, I have fixed the error.
Password file TFM TOOL??
For TFM TOOL PRO. please use this Password: [www.frpbypasstool.com]
Hananeel